Processing Of Waxed-Up Denture Introduction
The complete denture processing includes flasking procedures, dewaxing (wax elimination) procedures, and curing procedures.
Table of Contents
Flashing Procedure
Step 1:
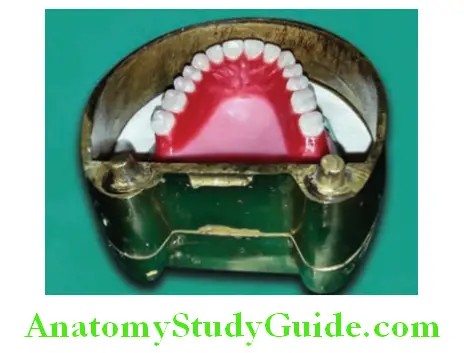
Seal the maxillary and mandibular waxed-up dentures on respective casts. Take care not to disturb the root morphology carved on the denture and avoid overfilling to the land area. After sealing, close the articulator and reevaluate the occlusion.
Read and Learn More: Preclinical Prosthodontics Notes
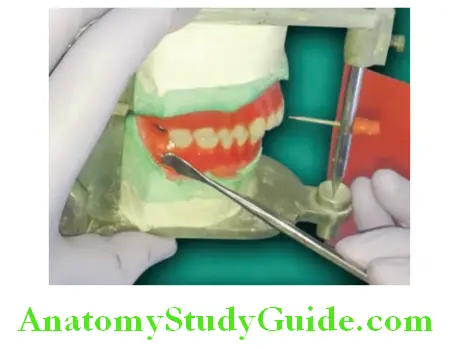
Step 2:
Safely demount the casts along with sealed try-in dentures from the mounting plaster of the articulator. The indexing should not be fractured while demounting the casts.
Step 3:
Select the flask that accurately fits with its parts without rocking and gaps in between parts. Put the cast with the sealed try-in denture on the desk and make sure that the teeth on the trial denture are not projecting out of flask height. There should be equal clearance between the cast and the wall of the flask.
Step 4:
Put the casts in slurry water for 5–10 minutes. The casts will take up slurry water hence it will not absorb water from investing plaster. This is required for a good union between cast and investing plaster.
If the cast absorbs water from investing plaster, it results in weak bonding between them. Mix dental plaster according to the recommended water-powder ratio. Manipulate it to make a smooth and creamy mixture.
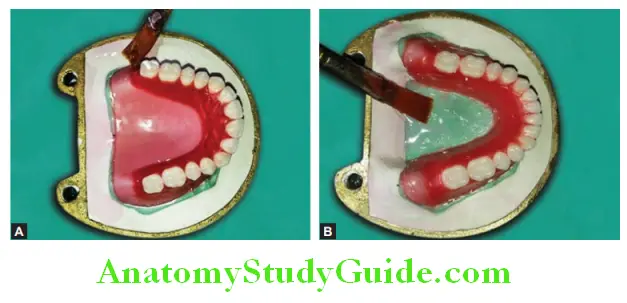
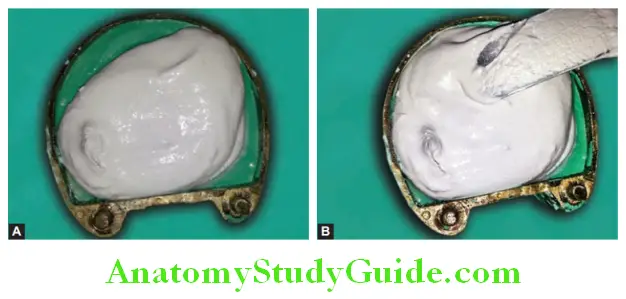
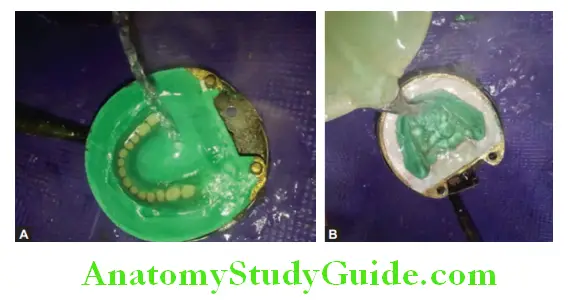
Step 5:
Pour the smooth, creamy mixture into the base of the flask till two-thirds of its height.
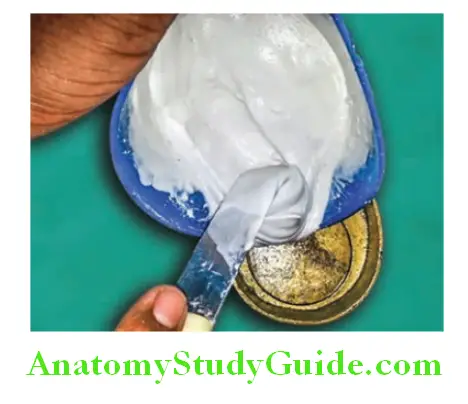
Note: Pouring the investing plaster into the base of the flask is called as first pour.
Step 6:
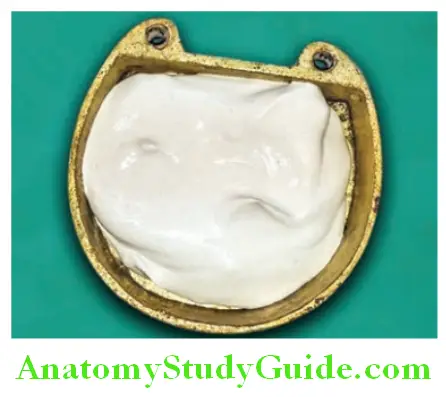
Remove the cast from the slurry water and place it in the center of the flask over the investing plaster in such a way that the occlusal plane is parallel to the base of the flask.
Step 7:
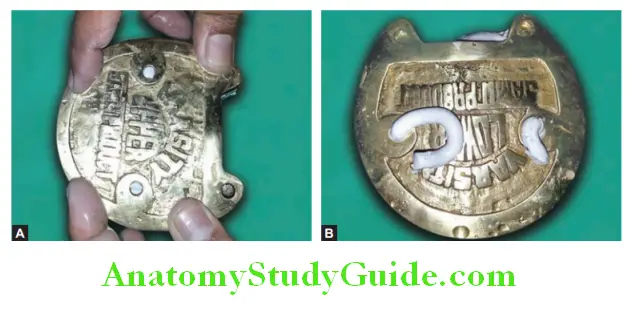
Smooth the investing plaster around the cast with a spatula. Add or remove the plaster as needed. The investing plaster should merge with the land area of the cast. There should be an inclined surface of investing plaster, starting
from the land area of the cast to the rim of the flask. Make sure that there are no undercuts in
this slope. The heel area of the mandibular cast should form a slop at 45° to the rim of the flask. Smooth the investing plaster with wet cotton.
Note: This part of investing plaster should be free of undercuts. Undercuts will prevent the separation of parts of the flask.
Check the periphery of the base of the flask. The rim of the flask should be clean. Any plaster in this area will prevent the complete seating of parts of the flask. Put the counter on the base and check that the teeth are within the flask.
Step 8:
Apply cold mold seal (separating medium) on the first pour. Take care not to apply a separating medium on the denture base and artificial teeth. Some separating mediums may stain acrylic teeth.
Step 9:
Assemble the counterpart of a flask on the base part. Make sure both parts are seated perfectly without any gap in between. Manipulate dental stone according to the recommended water powder ratio till it becomes smooth and creamy
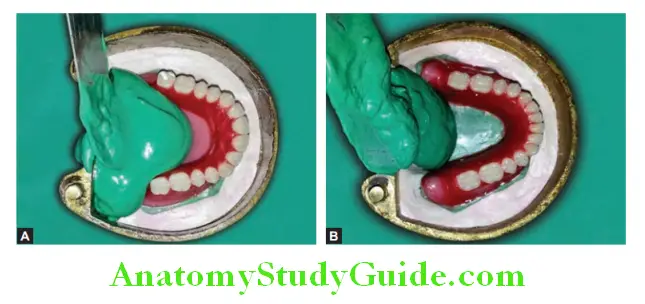
mixture. Pour it into the flask from one side till it covers all areas and reaches to other side. Vibrate the flask and make sure that the dental stone flows and fills all areas without air incorporation.
Step 10:
Fill the dental stone till the incisal and occlusal surfaces. Clean incisal and occlusal surfaces with finger/cotton to expose them.
Note: This part of flask pouring is called a second pour.
Step 11:
Manipulate dental plaster according to the recommended water-powder ratio till it becomes a smooth and creamy mixture. Pour it on the exposed incisal and occlusal surface to fill the top surface of the flask.
Note: This part of pouring is called as third pour. Three pour techniques enable easy removal of dentures after curing.
Step 12:
Make sure that, the rim of the flask is clean of any material. Put the lid on the counter of the flask and press it nicely. The excess material will come out from the vent holes provided on the lid. Clean any excess material flown out from the flask.
Note: In two pour technique, the second and third pour is replaced by a single pour.
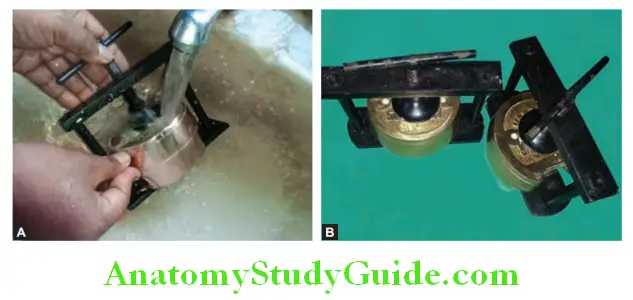
Step 13:
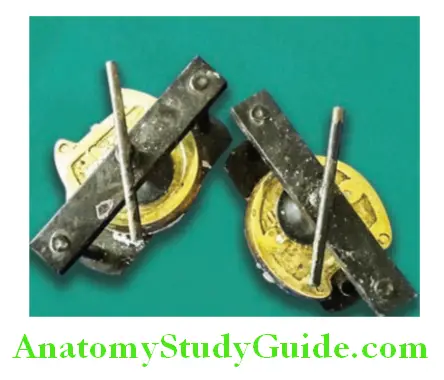
Put the flask into the clamp assembly and tighten it properly. Wash excess plaster under tap water. The flasking procedure is completed. Allow investing materials (dental stone and dental plaster) to set for 20–30 minutes before going for the wax elimination procedure.
Dewaxing Procedure (Wax Elimination Procedure)
The dewaxing procedure or wax elimination procedure is done to remove wax, which is used to hold the teeth on the denture base. After the wax elimination procedure, empty space (mould) is created in which acrylic resin is filled (wax is replaced by acrylic resin). Complete elimination of wax is required to avoid contamination of acrylic.
Step 1:
Loosen the clamp slightly. Put flask with clamp assembly into boiling water (100°C) for 5 minutes. This is done to just soften the wax not to melt the wax. Remove it from boiling water after 5 minutes. Remove the flask from the clamp assembly.
Note: Dewaxing for a longer time will lead to the dispersion of the wax into the investing plaster. Once it disperses into the plaster, it is difficult to completely remove the wax.
Step 2:
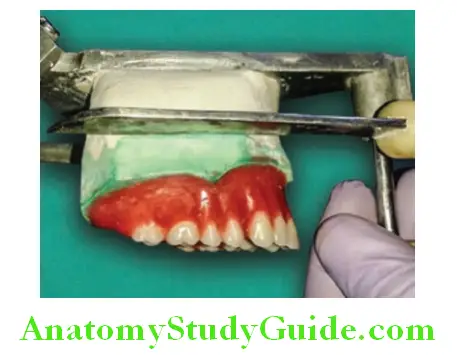
Place a plaster knife on the joint between the base part and the counterpart of the flask. Hit slowly on a plaster knife with a rubber hammer to open the flask
Note: Be careful while opening the flask. Molten wax may burn skin. Safety precautions should be practiced during this exercise. Use eyewear, and heavy-duty gloves to protect yourself from boiling water and steam.
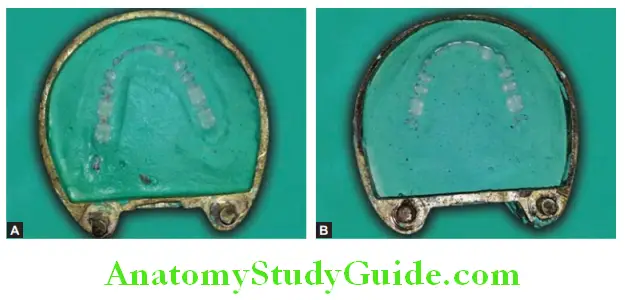
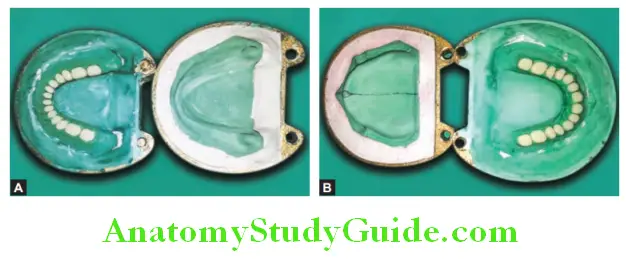
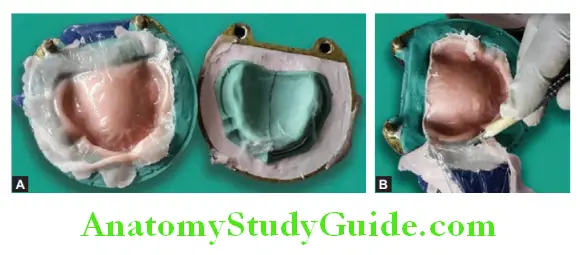
Step 3 :
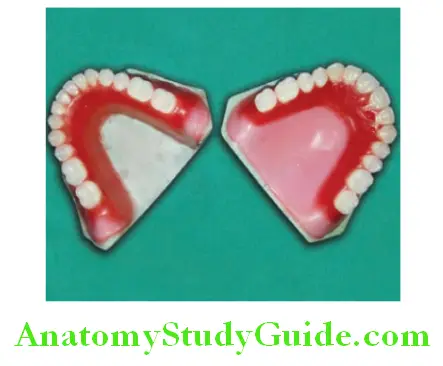
Carefully remove the temporary record base. Wash out molten wax with hot water mixed with soap water. Continue to pour hot water till elimination of all traces of wax. Finally, wash it with clean hot water.
Note: Soap water will react with gypsum and form a membrane impermeable to wax. This prevents wax from dispersion in investing dental plaster

Packing The Acrylic Resin In The Mould
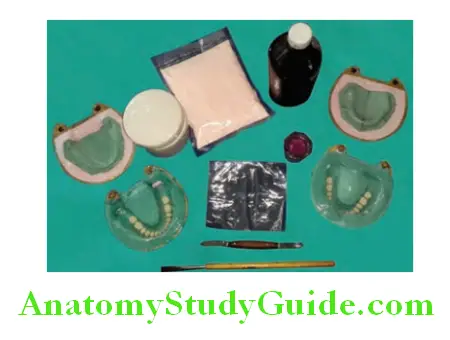
Armamentarium:
- Heat cure acrylic resin (polymer and monomer)
- Cold mold seal
- Painting brush
- Wax Knife
- Dappen dish/dish
- Cellophane sheets
- Porcelain jar with lid.
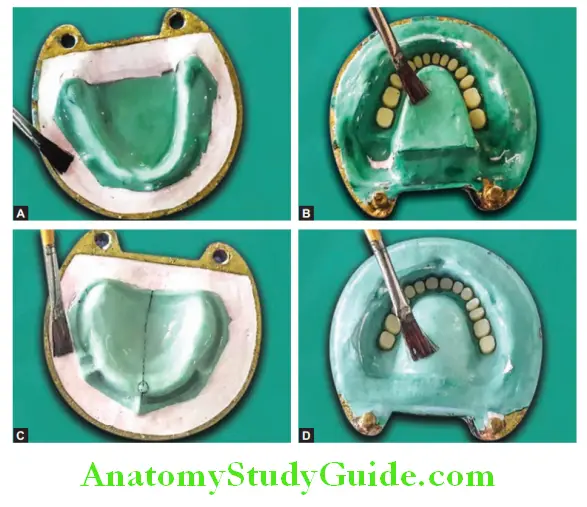
Apply a cold mold seal on the stone surface of the flask. Apply two to three coats of cold mold seal on investing material and one coat on casts. Apply it with a clean brush in one direction only. Do not apply it into and fro motion. Do not apply it on the ridge lap area of teeth. Allow the flask to cool down to room temperature before the packing procedure.
Note: Apply one coat of cold mold seal immediately after the dewaxing procedure when the flask and investment plaster are still warm. Apply a second coat immediately before packing the acrylic resin.
Note: Apply cold mold seal in one direction only. If applied into and fro motion, it removes the formed thin layer of calcium alginate which is the separating layer.
Acrylic resin is supplied as a polymer (powder) and monomer (liquid). Polymer and monomer are mixed in the recommended ratio, i.e. 3:1 by volume or 2:1 by weight.
There are five physical stages of resin manipulation wet sand stage, stringy stage, dough-like stage, and stiff or plastic stage. The ideal stage to pack resin into the mold is the dough stage.
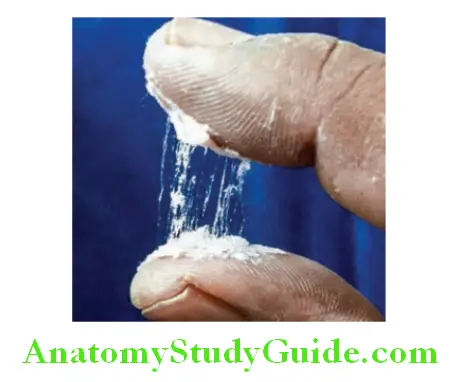
Wet Sand Stage:
In the first stage of resin manipulation, the material is grainy in consistency.
Stringy Stage:
This is the second stage of resin manipulation. In this stage, the material is sticky in consistency.

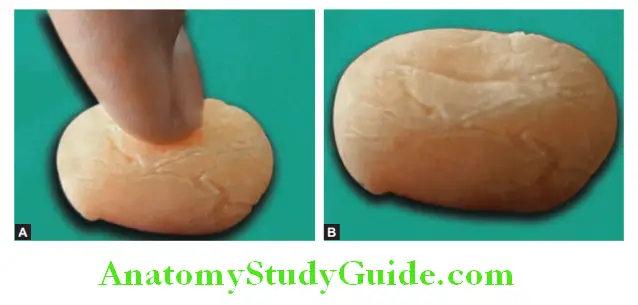
Dough-like Stage:
It is the third stage of resin manipulation. The material in this stage has no stickiness. It becomes pliable and can be easily separated
from the porcelain jar. Manipulation is easy in this stage. The material in this stage can flow easily and can be molded according to the desired shape.
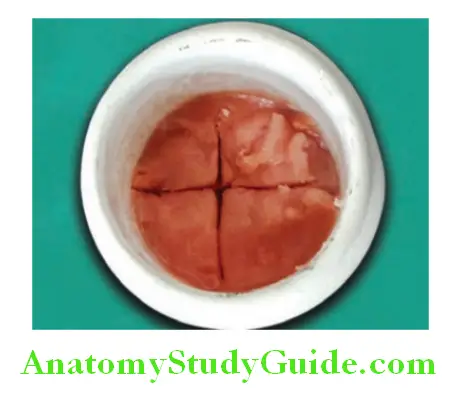
Note: How to check the dough-like stage?
Try to separate the material into two or more sections in a porcelain jar. If the sections are not merging with each other then it is in the dough-like stage.
Rubbery Stage:
This is the fourth stage of resin manipulation. The material becomes rubbery no longer flows freely and cannot be molded in the desired shape.
Stiff Stage:
This is the fifth stage of resin manipulation. The resin becomes dry and resists mechanical deformation. It cannot be molded in the desired shape.

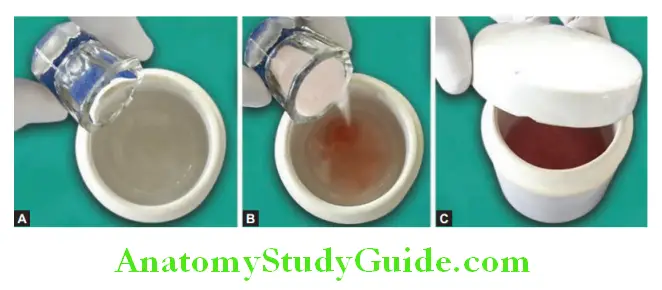
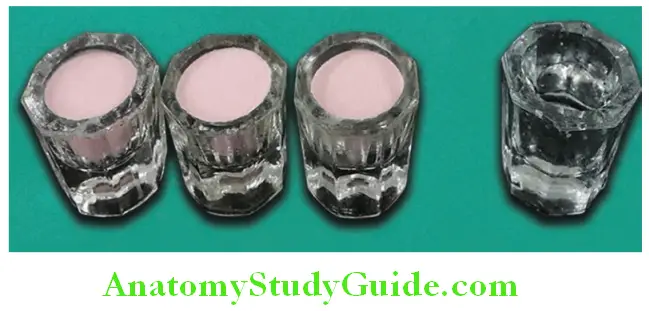
Measuring the Polymer and Monomer by Volume:
Take a dappen dish to measure the quantity of polymer and monomer by volume. Take one dappen dish full of monomer and shift it into the porcelain jar. Take polymer full of dappen dish three times and shift it in porcelain jar to mix with monomer. Close the porcelain jar with a lid. This will prevent the evaporation of monomer and so prevent any change in polymer monomer ratio.
Note: Take the correct volume of polymer and monomer. Excess monomer increases the polymerization shrinkage and less monomer results in porosity.
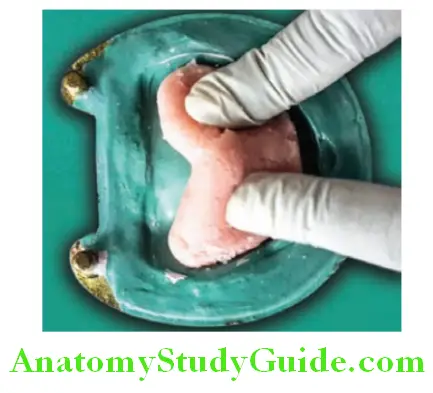
Step 1:
Remove the acrylic resin from the jar when it reaches the stringy stage or early dough stage. Kneading is done to improve handling characteristics. Packing is done when it is in the dough-like stage. Wear gloves to avoid contamination of resin. Adapt the resin in the mold of the flask. Place the wet cellophane sheet over the acrylic resin.
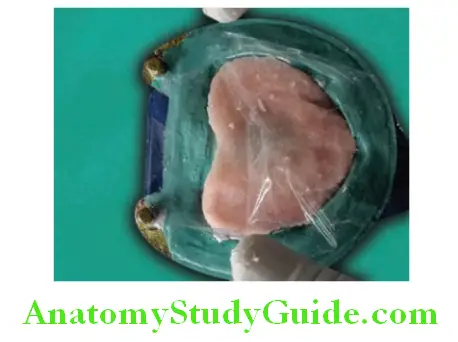
Step 2:
Place the second half of the flask over the wet cellophane sheet and close it. Make sure that two halves of the flasks are incorrect contact.
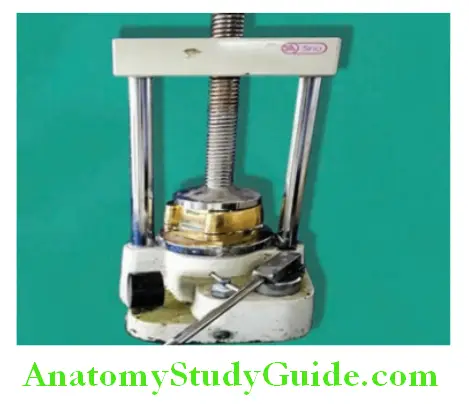
Compress the flask in a hydraulic press under 1,500 psi. The excess acrylic resin will come out from the flask.
Note: The excess acrylic resin coming out from the flask is called a “flash”.
Step 3:
Remove the flask from the hydraulic press. Open the upper and lower halves of the flask. Remove the cellophane sheet. Remove the excess material with a blunt knife without making a scratch on the plaster surface. Repeat the procedure till all excess material is removed.
Note: This procedure of removing excess material is known as “trial closure”.
Step 4:
Apply another coat of separating medium on the stone surface before the final closure of the flask. Do not place the cellophane sheet during final closure.
Step 5:
Tighten the flask in a hydraulic press under 3,500 psi. Then transfer the flask in the manual bench press. The flask is kept in a bench press for 30 minutes before heat processing under a water bath. This is called “bench curing”. Remove the flask from the manual press and place it in clamps.
Note: Bench curing: A stage of resin processing that allows a chemical reaction to occur under the conditions present in the ambient environment.
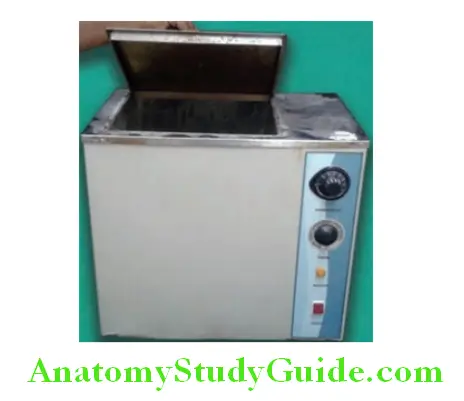
Heat Processing/Curing/Polymerization
Heat processing of acrylic resin is done in a water bath. The laboratory equipment used for the acrylization procedure is called an “acrylizer unit”. This unit has a temperature and time-controlling system. The curing cycle/polymerization cycle is the technical term for the heating process used to polymerize the resin. It controls the temperature for a definite time for polymerization. There are two types of curing cycles depending on the duration and temperature. They are a short curing cycle and a long curing cycle.
Short Curing Cycle:
In this curing cycle, the flask is kept in a water bath at 74°C for 1.5 hours and then the temperature is raised to 100°C and maintained for 1 hour.
Long Curing Cycle:
In this cycle, the temperature is kept at 74°C for 8–9 hours.
Note: The boiling point of the monomer is 100.8°C. Temperature rise beyond this will lead to boiling of monomer resulting in denture porosity.
The flask after heat processing should be left in the water bath for slow cooling till room temperature. Sudden cooling of the flask can result in a warpage of denture due to differential thermal contraction of resin and investing gypsum products. Ideally, it should be cooled overnight.
Deflasking Procedure
Deflasking is the separation of the flask into two parts after the curing procedure.
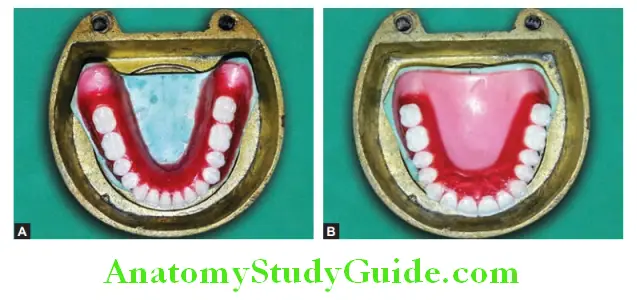
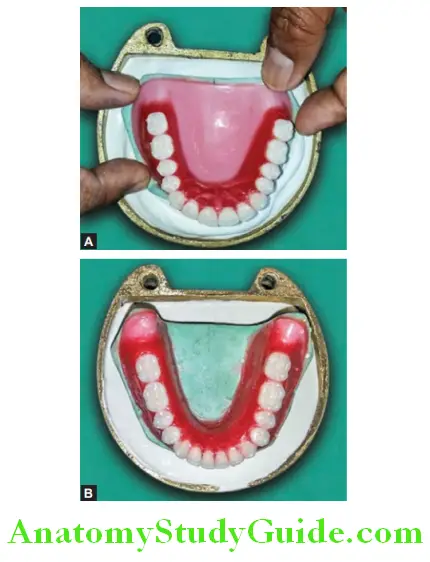
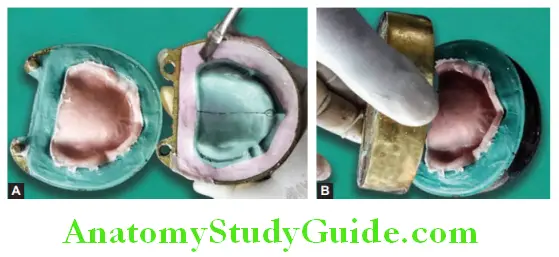
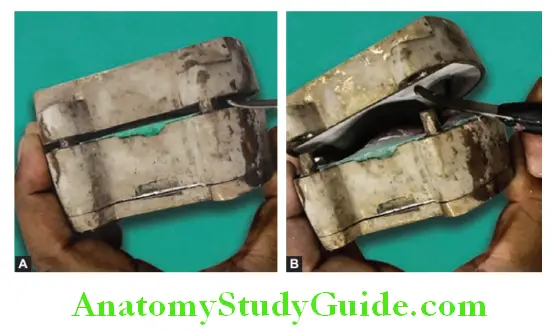
Step 1:
Remove the flask from the clamps. Try to open the flask (base and counterparts of the flask) by engaging the curved end of the wax knife or using a plaster knife as shown A and B.
Step 2:
The counterpart of the flask is open from both sides. Slowly tap the outer surface of the counter to loosen and break the investment plaster.
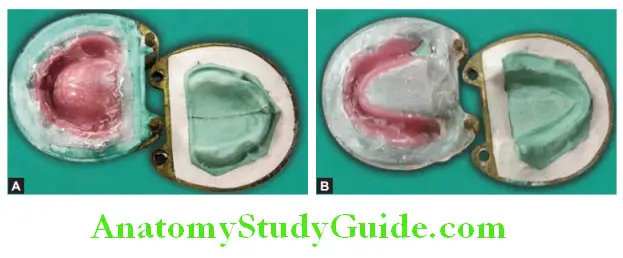
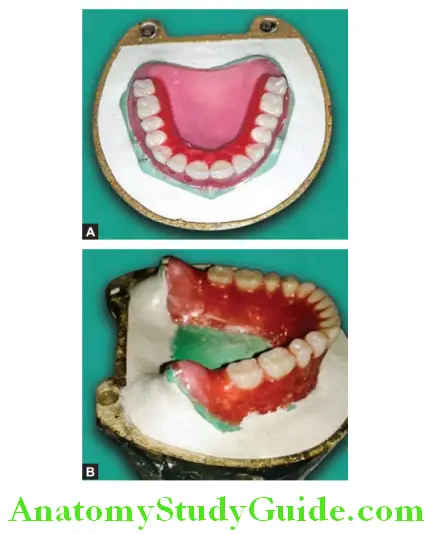
Step 3:
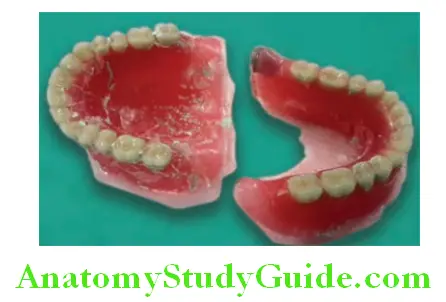
Retrieve the denture carefully from the investment plaster.
Remount Procedure And Selective Grinding
Objective:
There are chances of alteration in teeth position during waxing, packing, and processing procedures. These alterations in teeth position may lead to occlusal discrepancy and premature contact. To correct this altered position of teeth and to obtain a smooth even contact of the teeth in centric and eccentric positions, remounting and selective grinding procedures is done.
Processing Errors:
During flasking and processing changes in the occlusion may occur due to several possible causes called processing errors.
Processing errors are due to the following reasons:
- Dimensional changes in the wax after setting up of the teeth can cause teeth movement.
- During the curing process of heat-curing acrylic resin, acrylic resin expands and contracts.
It expands as the polymerizing temperature is reached and then starts to contract (polymerization shrinkage). Then as it cools to room temperature it contracts again.
The total effect of this dimensional change is a slight shrinkage which may change the position of the teeth. - The expansion of the investing material during the processing may change teeth position.
- The pressure of the flask press during packing affects teeth position.
In order to correct these errors, the dentures are returned to the articulator after
deflating. The casts are repositioned on the original plaster mountings using the indexing (notch indexing or groove indexing) in the base of the cast.
If the incisal pin does not touch the incisal guide table after remounting it means that the occlusal vertical dimension has been changed and must be re-established. Selective grinding is exercised to re-establish the vertical dimension of occlusion.
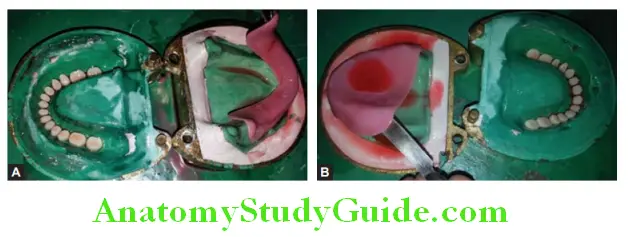
Selective Grinding:
Selective grinding is carried out using articulating paper to mark the area of premature contacts.
Red articulating paper is used to mark centric occlusion contacts and blue articulating paper for the eccentric occlusion contacts. Grinding of premature contacts is done with small green or diamond stones.
As a rule in selective grinding, the centric holding cusps or functional cusps are not altered. In the maxillary arch, palatal cusps are functional cusps and in the mandibular arch, buccal cusps are functional cusps.
These cusps are essential to maintain the recorded vertical dimension. So, if interference exists, reduce either upper buccal cusps or lower lingual cusps to establish the correct vertical dimension of occlusion. This is called the BULL rule.
Note:
BULL rule: Buccal Upper and Lower Lingual (cusps to be reduced during the selective grinding procedure)
Leave a Reply