Fabrication Of Occlusal Rims Introduction
This chapter explains the fabrication of wax occlusal rims using the rolled wax technique. This is the most commonly used method for the fabrication of occlusal rims. Follow the procedure step by step for accurate fabrication of occlusal rims.
Table of Contents
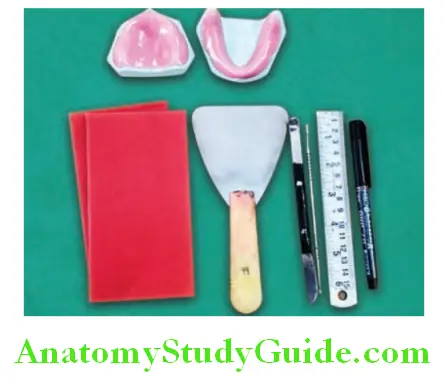
Armamentarium
Maxillary and mandibular master casts with record base.
- Modeling wax
- Pencil or marker pen
- Bunsen burner
- Wax Knife
Read and Learn More: Preclinical Prosthodontics Notes
- Wax carver
- Wax Spatula
- Hot plate
- Metallic scale.
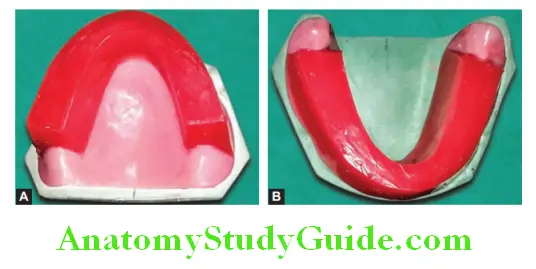
Fabrication Of Maxillary Occlusal Rim
Step 1:
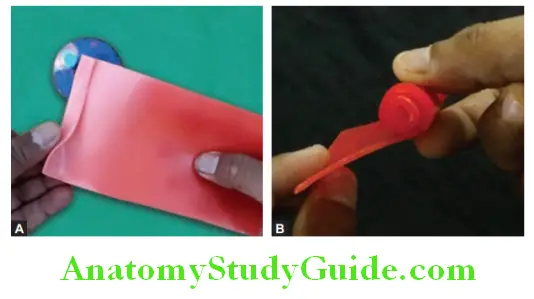
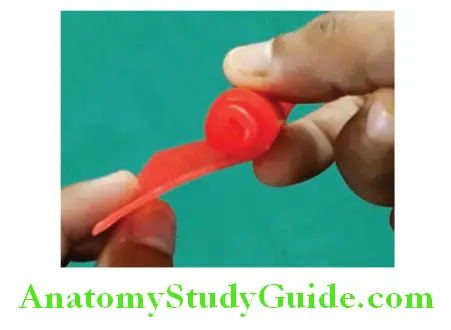
Take a sheet of modeling wax. Heat it over the flame of the Bunsen burner to soften it. Fold it from one end (approximately 0.5 cm). Take care not to melt it. Continuously soften it and roll it to prevent air bubble entrapment during rolling.
Step 2:
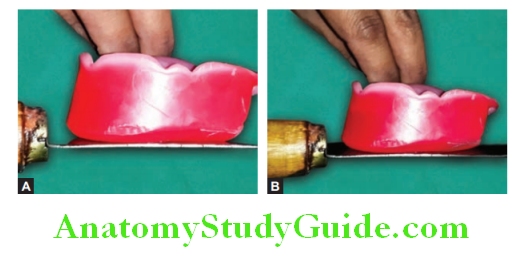
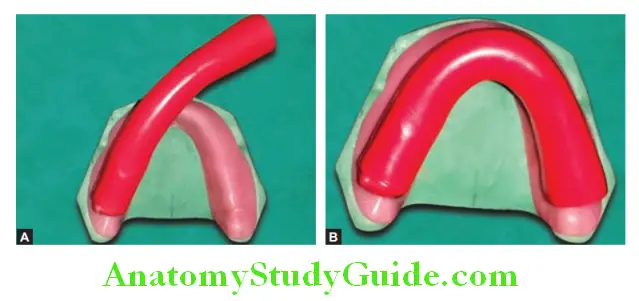
Roll the full wax sheet to get a wax roll of a diameter of around 2–3 cm. Place one end of the rolled wax on the posterior aspect of the record base (maxillary tuberosity) and follow the arch contour to the other posterior end.
Step 3:
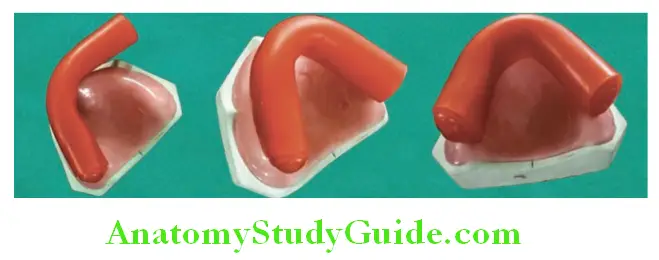
Apply downward pressure on a wax roll by holding it in between the index finger and the thumb to extend it along the borders. Follow the arch contour while doing this to maintain the arch.
Step 4:
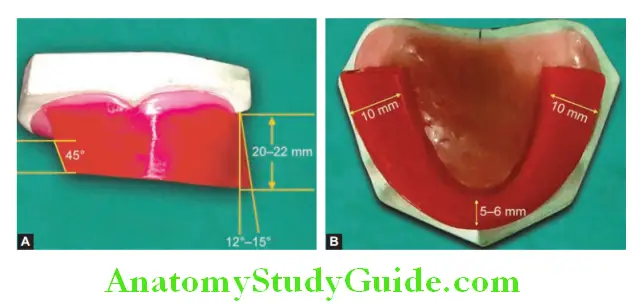
Give inside to outward push (thrust) in the anterior region. This is done to give inclination to the anterior rim. The inclination (protrusion) should be 12–15°. Due to inclination, the maxillary rim becomes thinner anteriorly compared to posteriorly.
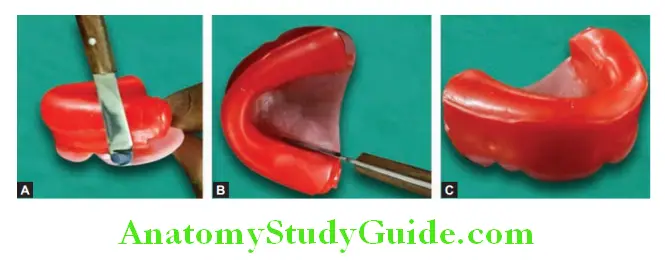
Step 5:
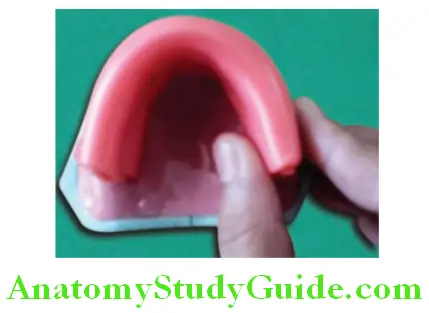
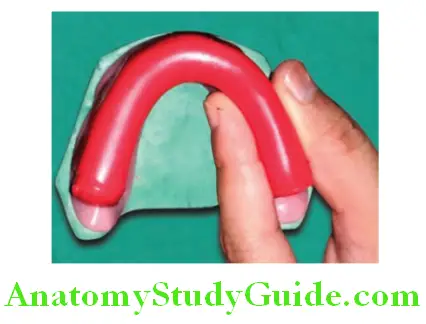
Seal the adapted wax on buccal and lingual peripheries using a hot wax spatula or wax knife. Add or remove wax to fill up voids, spaces, and irregularities. Smooth the buccal surface maintaining the arch.
Step 6:
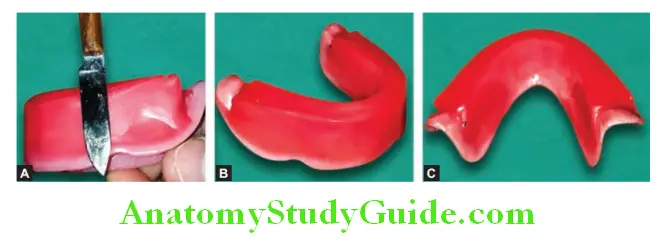
Cut the wax roll if extended over the maxillary tuberosity.
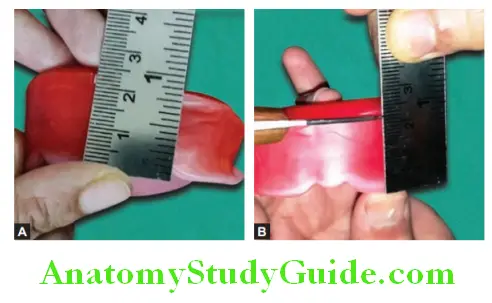
Step 7:
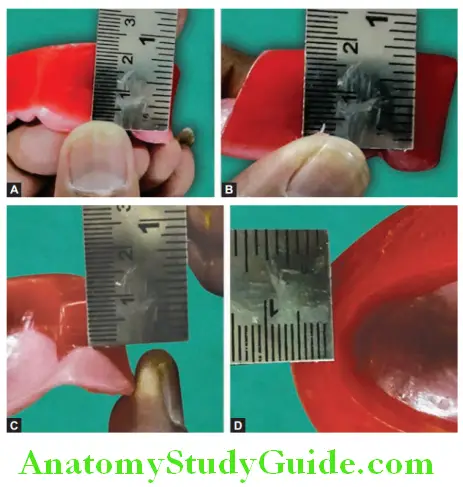
Measure the height of the occlusal rim in the canine area. Mark it 2–3 mm more than the required height.
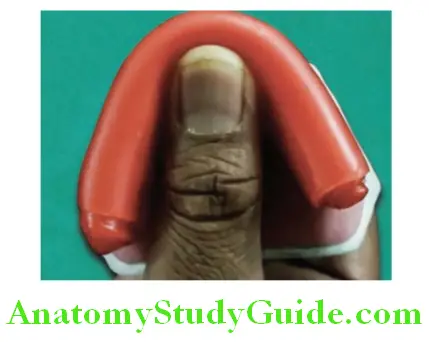
Step 8:
Reduce the excess height by using a hot plate. Perform this procedure very slowly and frequently check the plane during the reduction. The hot plate is used for the reduction of height and to make a plane of occlusion.
Step 9:
Make anterior height 20–22 mm in the canine region and posterior height 18 mm in the molar region from the border of the record base. Adjust the anterior width 5–6 mm and the posterior width 8–10 mm.
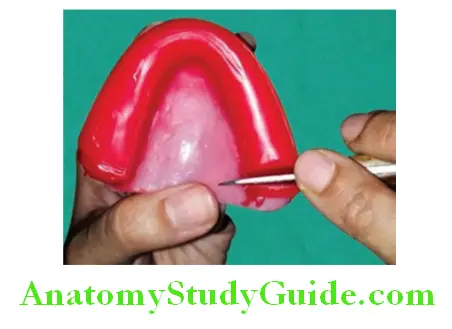
Step 10:
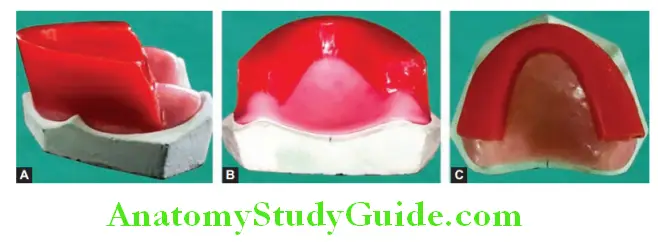
Remove excess wax from the borders. Check the tissue surface of the record base, it should be free of any wax. The labial, buccal, and lingual surfaces of the occlusal rim should be smooth and polished.
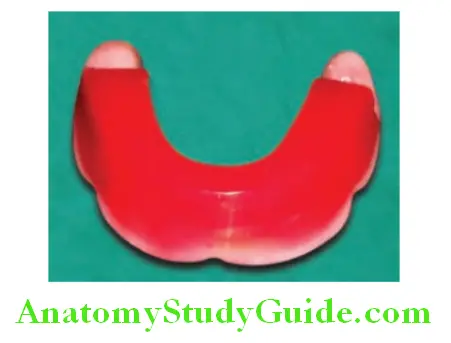
Fabrication Of Mandibular Occlusal Rim
Step 1:
Take a sheet of modeling wax. Heat it over the flame of the Bunsen burner to soften it. Fold it from one end (approximately 0.5 cm). Take care not to melt it. Continuously soften it and make a wax roll.
Step 2:
Place one end of the rolled wax on the posterior aspect of the record base (retromolar pad) and follow the arch contour to the other posterior end.
Step 3:
Apply downward pressure on a wax roll by holding it in between the index finger and the thumb to extend it along the borders. Follow the arch contour while doing this to maintain the arch.
Step 4:
Seal the adapted wax on buccal and lingual peripheries using a hot wax spatula or wax knife. Add or remove wax to fill up voids, spaces, and irregularities. Smoothen the buccal surface maintaining the arch form.
Step 5:
Position the wax rim on the mandibular ridge according to the guidelines. The rim should be extended to the anterior aspect of the retromolar pad. Position the wax rim equally on the buccal and lingual aspect of the crest of the ridge.
Step 6:
Mark the height of 16 mm in the canine region. The Posteriorly height of the wax rim is two-thirds of the height of the retromolar pad. Reduce the height accordingly with a hot plate.
Step 7:
Width in the anterior region is 5–6 mm and in the posterior region, it is 8–10 mm. Finished and polished maxillary and mandibular wax rims.
![]()

Leave a Reply