Mounting Occlusal Rims On Articulator Introduction
Mounting is done to position wax occlusal rims and casts on the articulator and fix them in a particular position. This chapter demonstrates a simple method to mount casts on a mean value articulator.
Table of Contents
Armamentarium
Maxillary and mandibular occlusion rims with casts.
- Mean value articulator
- Dental plaster
- Rubber bowl and plaster mixing spatula
- Wax Knife
- Modeling clay
- Thread
- Petroleum jelly.
| Body Fluids | Muscle Physiology | Digestive System |
| Endocrinology | Face Anatomy | Neck Anatomy |
| Lower Limb | Upper Limb | Nervous System |
Read and Learn More: Preclinical Prosthodontics Notes
Step 1:
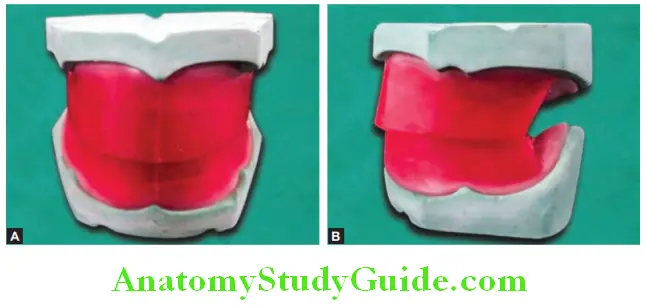
Indexing should be done on the base of the master cast using any of the indexing methods (groove indexing or notch indexing). Midline is marked on both the occlusal rims taking the labial frenum (on the cast) as a reference. Maxillary and mandibular rims are placed together in such a way that the maxillary rim overlaps the mandibular rim labially by 2 mm. The midline of maxillary and mandibular rims should coincide with each other.

Note: Horizontal overlapping of mandibular rim by maxillary rim is essential to achieve overjet in teeth arrangement.
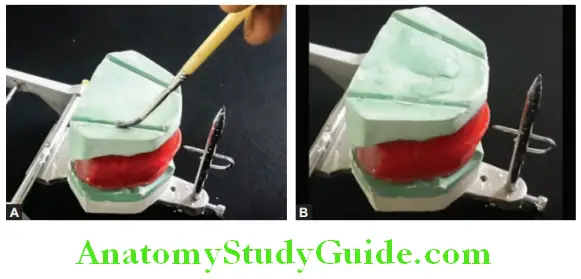
Step 2:
The rims are sealed together to maintain the horizontal overlapping. Sealing is done in the molar area by marking the cross with a hot wax knife. This sealing will prevent the movement of hot wax rims during mounting procedures and maintain them in a specific position.
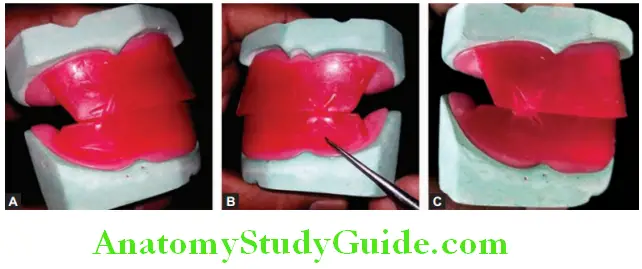
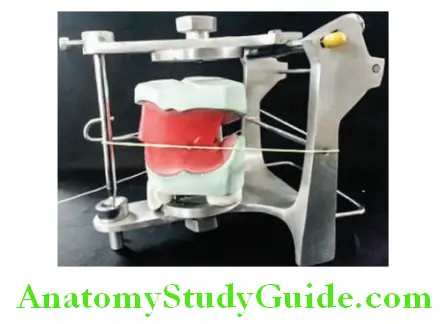
The rims are sealed at a specific position. The interface of two rims is an occlusal plane. In the articulator, the anterior reference point is the central pin and the posterior reference is provided by the posterior reference rod. The central pin and posterior reference rod form the plane of the articulator (or plane of orientation).
While mounting, the occlusal plane should coincide with the articulator plane (or plane of orientation). A thread tied on a posterior reference rod can be used to verify the position of the occlusion rim. Modeling clay is placed on the mounting ring of the lower member of the articulator. The sealed rims are placed on the clay accordingly so that the central pin is in the midline and it is at the level of the occlusal plane (between maxillary and mandibular rims).
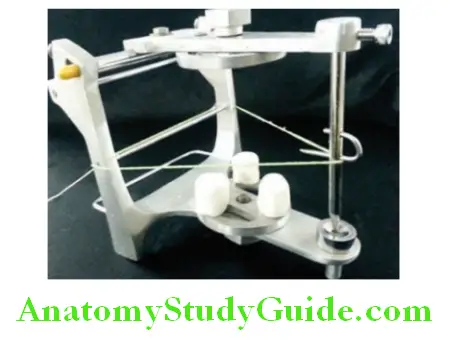
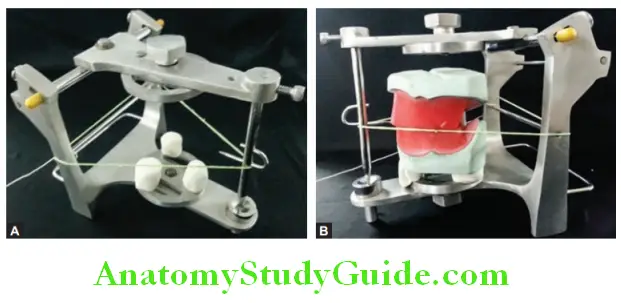
The position of the rims is adjusted in such a way that the occlusal plane (on the wax rim) matches with the articulator plane. The thread can be used for checking the match of two planes.
Note: Before adjusting the rims on the articulator, make sure that the central pin is fully seated in its position. Check the matching of two planes at eye level.
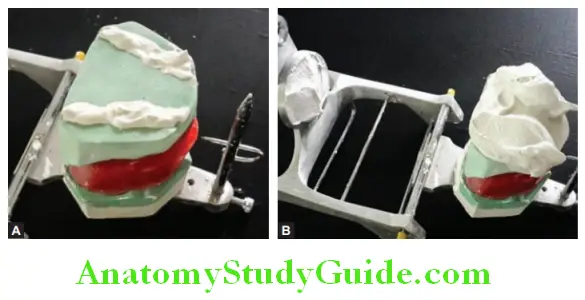
Step 3:
Apply a thin coat of petroleum jelly in the index (grooves or V-shaped notches).
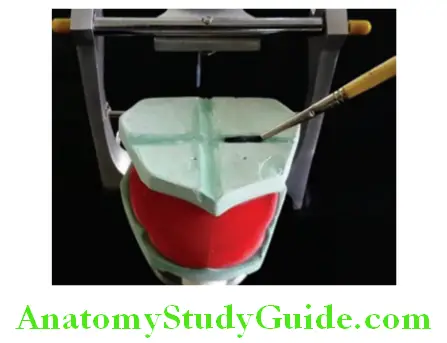
Step 4:
Mix dental plaster in homogeneous and creamy consistency using a rubber bowl and spatula. Pour mixed plaster into grooves or notches made on the base of the maxillary cast using a wax knife.
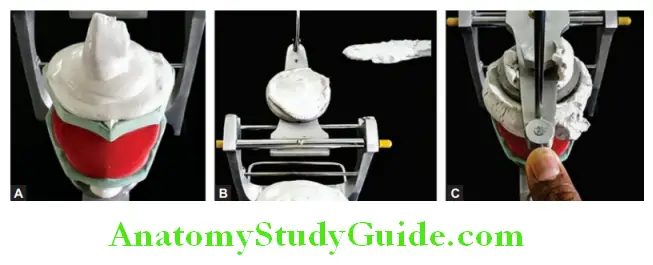
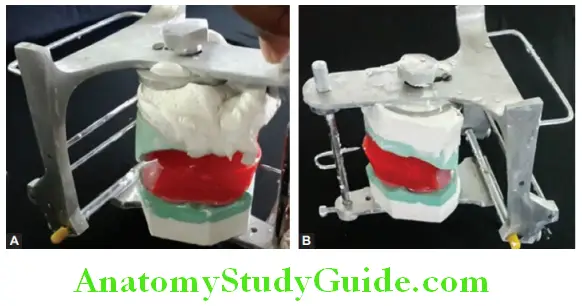
Step 5:
Pour the remaining mixed plaster on the whole base of the maxillary cast. Apply plaster on the mounting ring also. The close upper member of articulator. Allow plaster to fill the spaces provided in the mounting ring. Remove excess plaster coming out from the mounting ring and make it parallel to the upper surface of the mounting ring.

Note: The plaster used for mounting should be creamy in consistency. If it is not creamy and free flowing then during the closing of the upper member, pressure will be exerted on casts and this may change the position of rims which leads to the discrepancy of planes.
Step 6:
Try to shape mounting plaster according to the shape of the cast. Add or remove plaster as needed. Use a flat metal strip like a plaster mixing spatula or wax knife for shaping the plaster. Shape mounting plaster according to the periphery of the cast (according to the shape of the base of the cast).
Step 7:
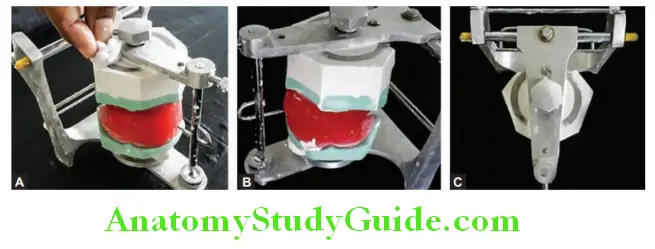
Use wet cotton or a finger to smooth the mounting plaster and allow it to set.
Step 8:
Once the upper mounting plaster is set, turn the articulator upside down to mount the mandibular cast. Open the articulator slowly and remove the clay.
Step 9:
Apply a thin coat of petroleum jelly on index of the base of the mandibular cast. Wet the cast base with water before applying plaster on the base.


Step 10:
Mix plaster and pour index first and then pour remaining plaster on base. Apply some plaster on the mounting ring also.
Step 11:
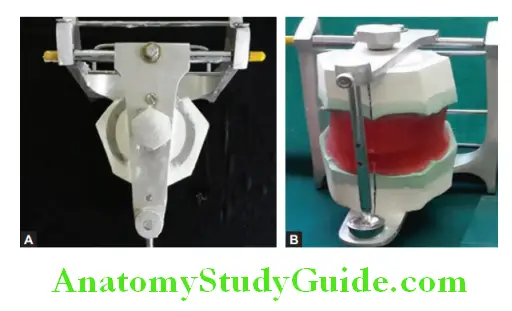
Close the lower member and follow the procedures performed during the mounting of the maxillary cast. Shape the mounting plaster according to the shape of the cast contour Smoothen the plaster using wet cotton. Use dry cotton to clean the articulator. Maxillary and mandibular casts mounted on mean value articulator.
Note: Never wash the articulator under tap water to clean it. This may expand mounting plaster which results in an increase of the vertical dimension of occlusion. If the plaster expands, the vertical pin will not be in contact with the anterior guide table. Extend the midline and canine lines on mounting plaster. Write the name, age, and sex, of the patient or roll no, and name.
Leave a Reply