Wax Up Of Complete Denture Introduction
Wax-up of a complete denture is done to contour the polished surface of the denture. Proper contouring of polished surfaces is important to aid in the retention and stability of complete dentures.
Table of Contents
Wax-up and carving contribute to esthetic by proper contouring of lost tissue, giving support to the lips and cheeks. It helps in proper phonetics. Properly made gingival embrasure helps in the self-cleansing of food particles. Contouring gingival anatomy gives a natural appearance to the patient while talking and smiling.
Read and Learn More: Preclinical Prosthodontics Notes
Armamentarium
- Maxillary and mandibular trial dentures
- Wax Knife
- Wax Spatula
- Carver
- Wax sheet
- Blow torch
- Toothbrush.
Wax-Up Of Maxillary Complete Denture
Step 1:
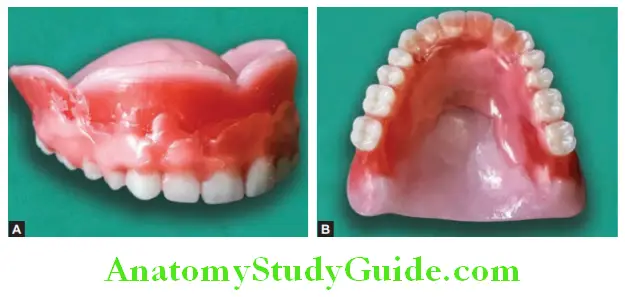
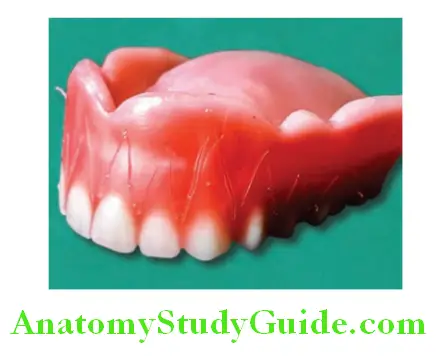
Soften the modeling wax and add it to the palatal surface, buccal, and the labial surface of the waxed denture. Add wax to cover the cervical part of the labial surfaces of teeth.
Waxing Up Of Complete Denture
Step 2:
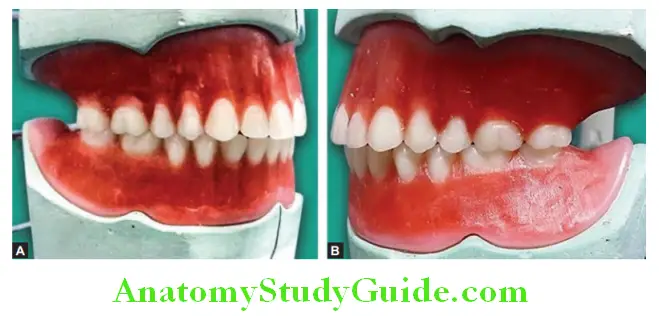
Hold the roach carver at a 60° angle to carve the gingival margin of anterior teeth. The gingival margin is placed according to the tilt of the tooth as shown to give the natural contour of the gingival anatomy.
Step 3:
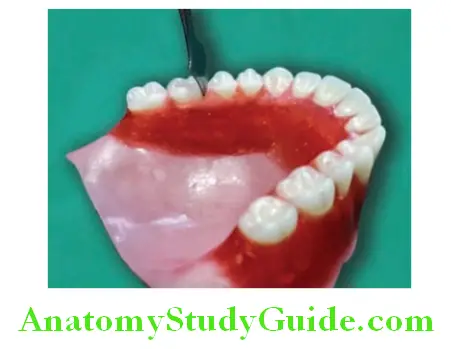
Hold the carver at approximately 45 ° angulation to carve the gingival margin around the posterior teeth.
Step 4:
Use a roach carver held at approximately 20° angle to carve the lingual surface of denture teeth. Maxillary buccal flange inclines laterally and superiorly.
Step 5:
Place markings for roots on the labial surface of the denture as shown. Mind the tilt of the cervical part (neck) of the tooth while placing the markings. The root of the tooth is in continuation with a tilt of the tooth.
Step 6:
Remove wax between two root markings and try to give bulge on marking areas.
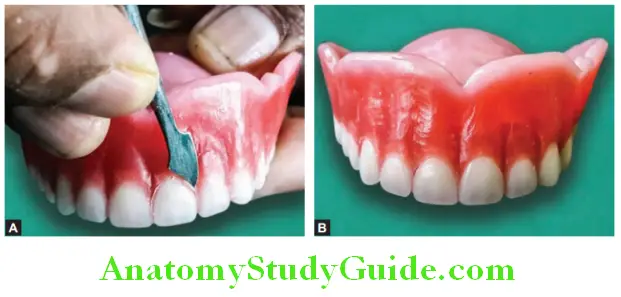
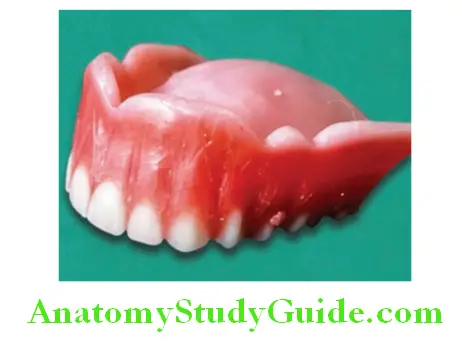
Use a Carver for this procedure. Roots are wider at the beginning (cervical area) and become slender at the apical area.
Step 7:
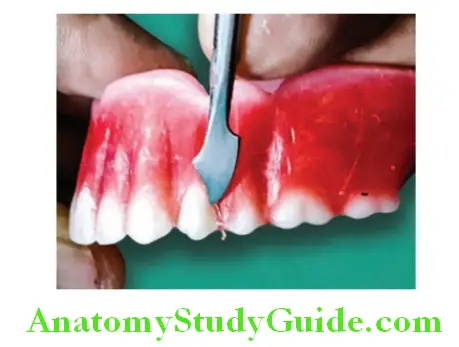
Do not make roots till the denture borders. The root carving of the central incisor is kept short of the denture border. The root carving for the lateral incisor is about three-fourths of the length of the central incisor’s root. The apical end of the carving is slightly distally tilted.
Step 8:
Make root carving for the canine immense than that of the central incisor. It is longer than the central
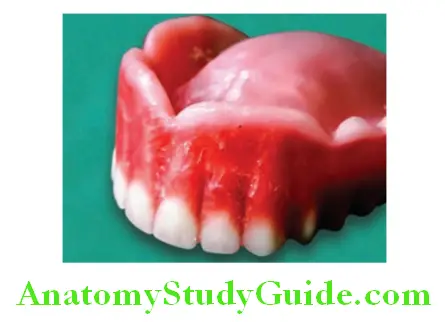
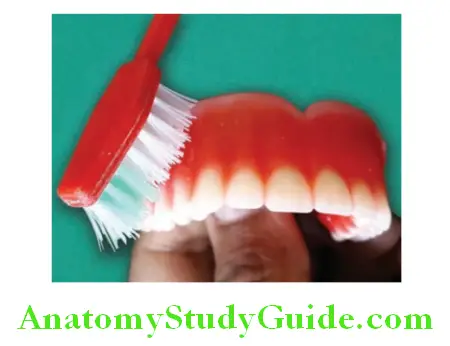
incisor. Finish of roots with a brush by applying mild pressure. Stippling is an orange peel-like appearance of the attached gingiva. In dentures, stippling can be created by pressing the tips of the bristles of the brush in wax.
Waxing Up Of Complete Denture
Step 9:
Add wax in a drop shape on the palatal surface between two central incisors to form the incisive papillae. Add wax in a thin line along the mid-palatine raphe on the palatal surface form a groove in the center and smudge it with a blow torch to form a mid-palatine raphe.
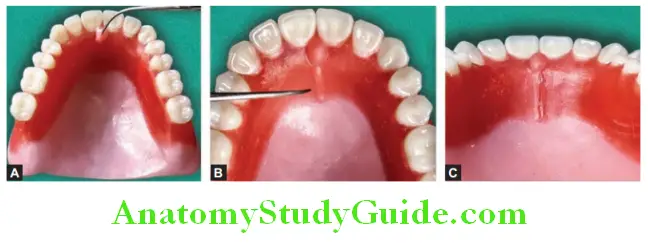
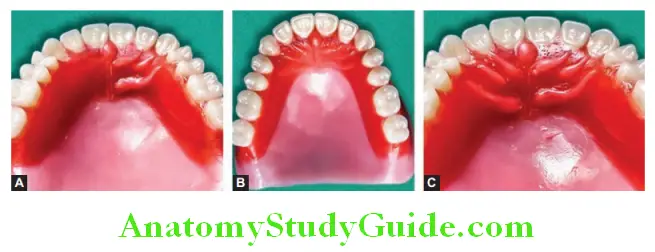
Step 10:
From the crests and valley of rugae on both sides of the midpalate raphe in the anterior palatal area. This will aid in speech.
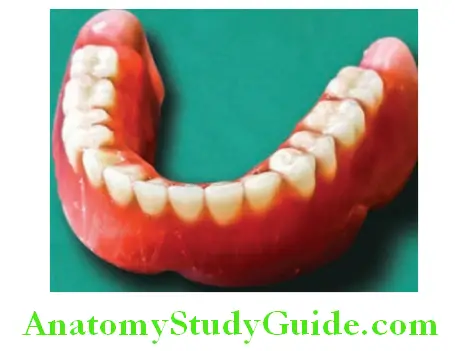
Wax Up Of Mandibular Complete Denture
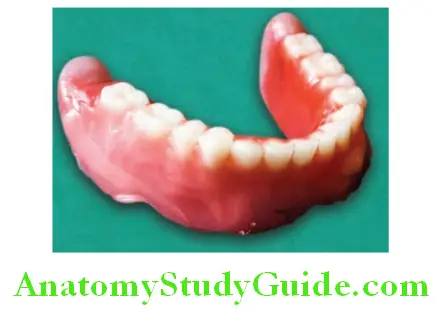
Step 1:
Soften the modeling wax and add it to the buccal and lingual surface of the waxed denture. Add wax to cover the cervical part of the labial surfaces of teeth.
Denture Wax Up
Step 2:
Hold the roach carver at approximately 20° to carve the gingival margin. Shape the interdental papillae and gingival bulge similar to maxillary denture.
Step 3:
Place markings for roots on the labial surface of the denture as shown. The mandibular teeth roots markings are placed vertically
Step 4:
Remove wax between two root markings and try to give bulge on marking areas. Use a carver for this procedure. Roots are wider at the beginning (cervical area) and become slender at the apical area.
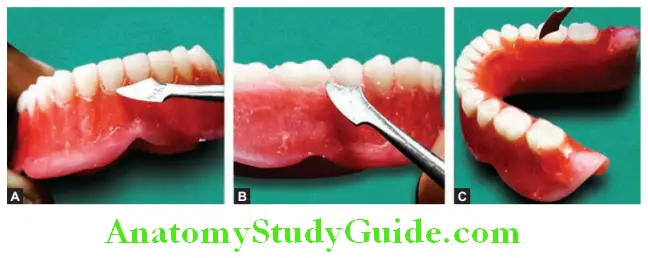
Step 5:
Wax the distolingual area of the lingual Flange to blend it with the retro mylohyoid area. Shape the lingual Flange as an inclined plane to accommodate the tongue.
Denture Wax Up
Step 6:
Make a shallow depression in the molar area of the mandibular denture. The mandibular buccal flange should incline laterally and inferiorly lingual flange should incline medially and inferiorly.
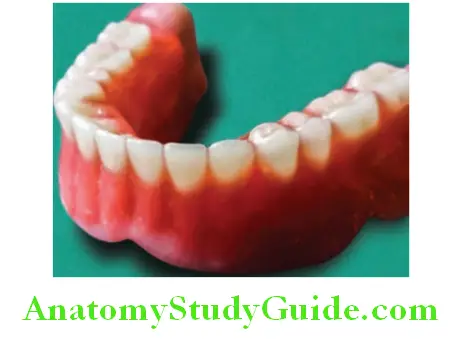

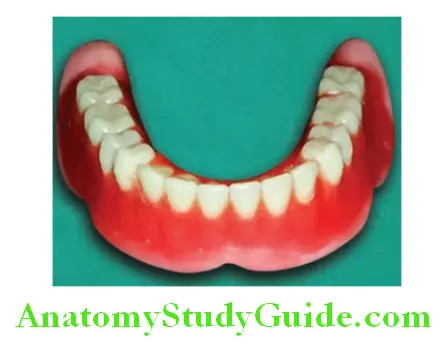
Flame the waxed-up dentures slowly using a blow torch or chip blower and Bunsen burner. Take care not to overheat and melt the wax. Use a toothbrush lightly to give the stipple the appearance of an attached gingival.
Leave a Reply