Arrangement Of Artificial Teeth Introduction
Correct selection of artificial teeth and their correct arrangement is critical factor determining success and acceptance of prosthesis by patient. Varieties of artificial teeth are available in market. They are selected according to patient’s need for aesthetic and other factors. This chapter describes regarding the arrangement of artificial teeth for complete denture.
Table of Contents
Sequence Of Arrangement Of Teeth
The sequence of arrangement of teeth has been shown.
Read and Learn More: Preclinical Prosthodontics Notes

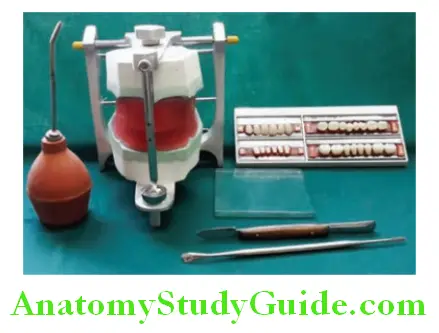
Armamentarium
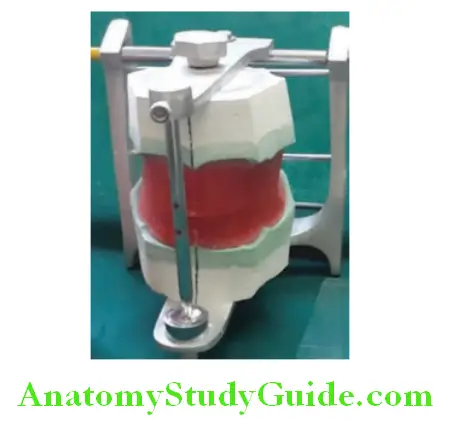
Mean value articulator with mounted maxillary and mandibular occlusion rims on Final cast.
- MacIntosh sheet
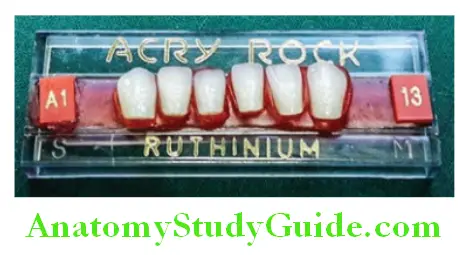
- Acrylic teeth on tooth card
- Glass plate
- Wax spatula
- Wax knife
- Lecron’s carver
- Spirit lamp/burner.
Mark midline on maxillary occlusal rim with sharp instrument like carver. Extend this midline on cast and mounting plaster with pencil or marker. is will guide during teeth arrangement when midline onwax rim is not clear.
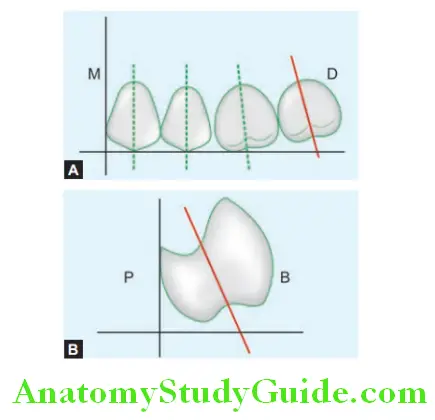
Note: While teeth arrangement, position of every tooth is finalized according to its relation with adjacent tooth, relation with glass plate (serve as occlusal plane), relation with rim contour, mesiodistal inclination, and labiolingual inclination.
Arranging Maxillary Anterior Teeth
Arrangement of Maxillary Central Incisor:
Step 1:
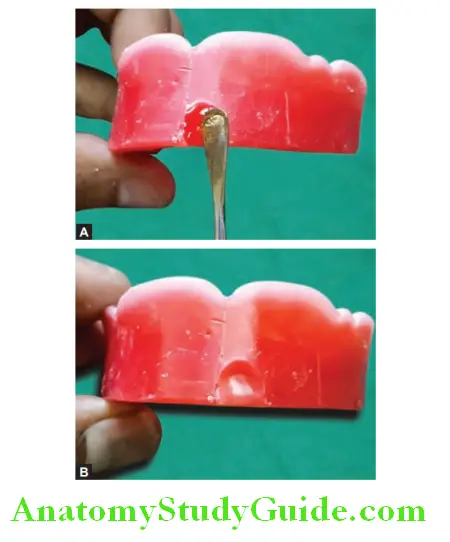
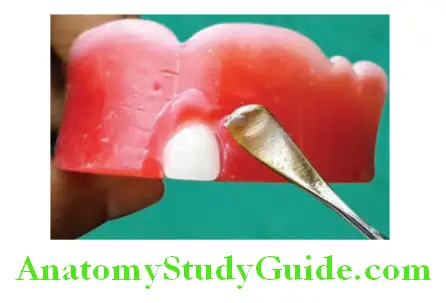
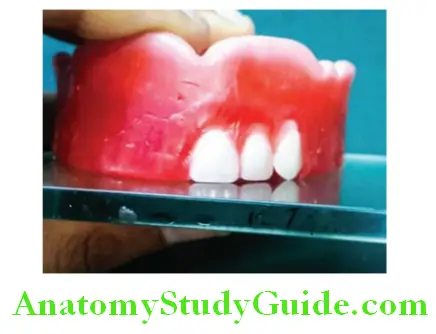
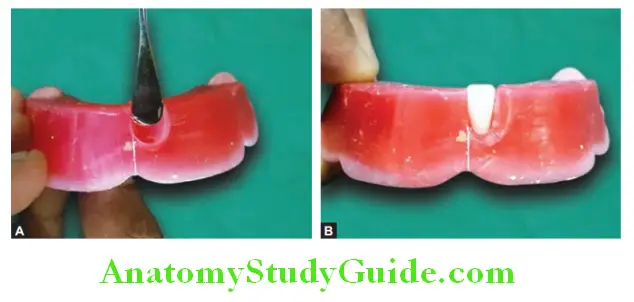
Select anterior teeth according to arch shape, facial type, and other factors. Heat wax spatula and pool wax from labial surface of maxillary occlusion rim where central incisor is to be placed.

Step 2:
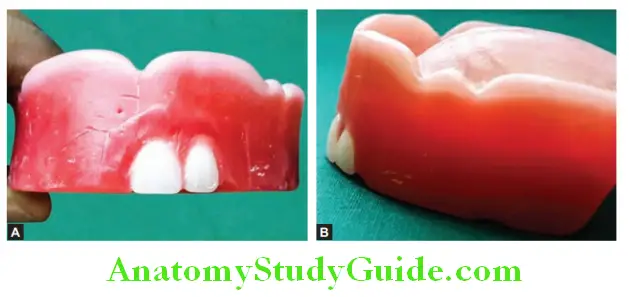
Take out central incisor from tooth card. Clean carding wax from ridge lap area. Soften the wax in the area again with wax spatula. Place the central incisor in the position and set it according to the set up angulations.
Teeth Arrangement In Complete Denture
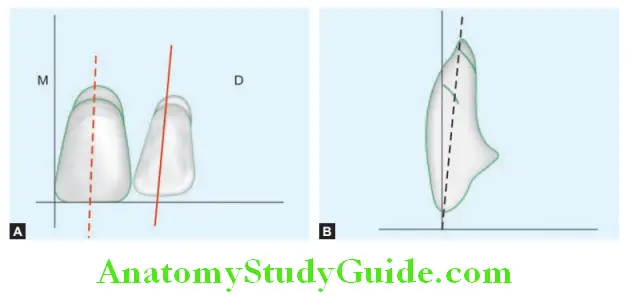
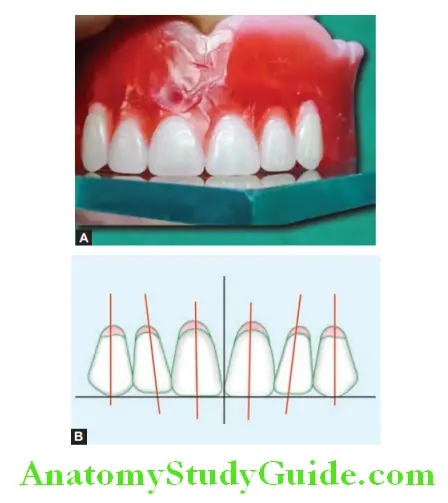
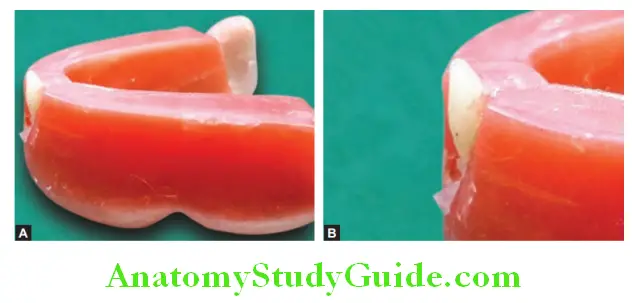
When viewed from front, the long axis of maxillary central incisor is positioned almost parallel to the vertical axis.
When viewed occlusally, the incisal edge of central incisor should follow the labial contour of maxillary wax rim. When viewed from side, the central incisor is sloped labially about 12–15°.
Maxillary central incisor arrangement guidelines:
Step 3:
Seal the central incisor in finally determined position with hot wax spatula. Chill the wax rim in cold water to set the wax and secure the incisor position.
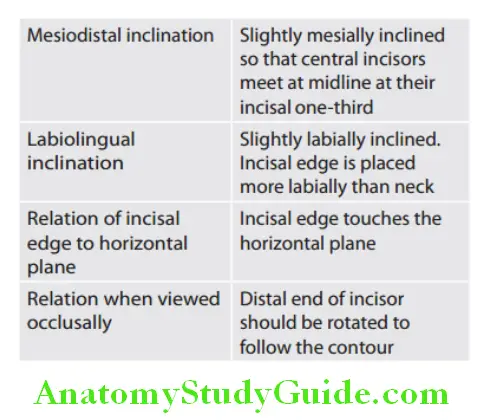
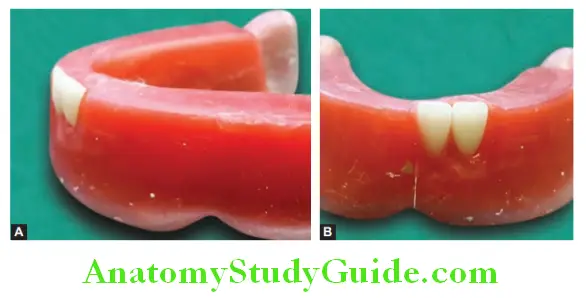
Arrangement of Maxillary Lateral Incisor:
Step 1:
Take out lateral incisor from tooth card and clean carding wax from ridge lap area. Heat wax spatula and remove wax from labial surface of maxillary occlusion rim in area where lateral incisor to be placed. Soften the area with hot wax spatula and Maxillary central incisor—frontal view and side view.
Step 2:
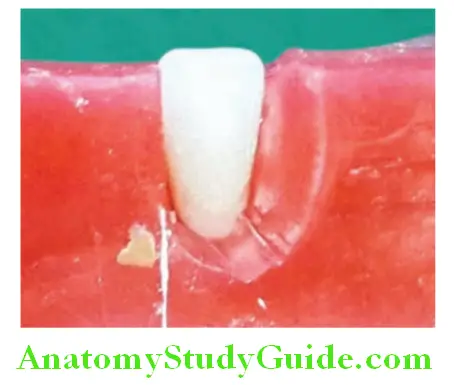
Seal the lateral incisor in finally determined position with hot wax spatula. Put the wax rim
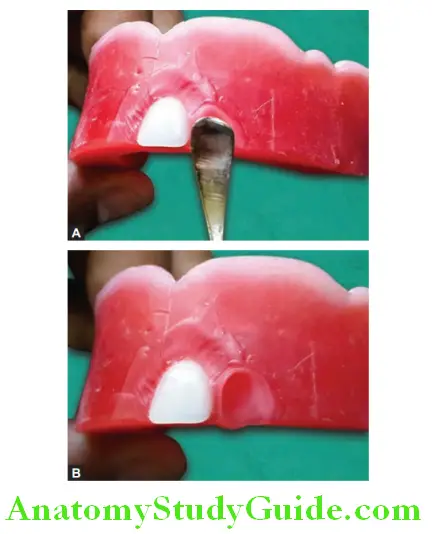
in cold water to set the wax and tooth. The incisal edge should be parallel to glass plate. Incisal edge is 1 mm above from the glass plate. The neck of the lateral incisor is inclined distally. Distal part of lateral incisor edge is rotated to follow labial contour of wax rim.
Maxillary lateral incisor arrangement guidelines:
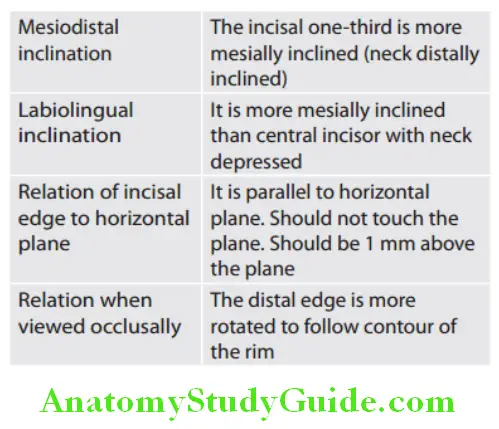
Note: While arranging lateral incisor focus to make incisal edge parallel to glass plate, the neck of lateral incisor will be inclined distally by default.
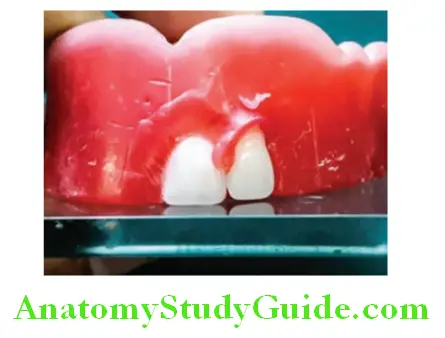
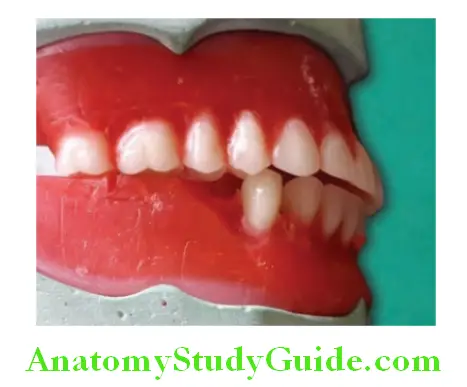
Arrangement Of Maxillary Canine
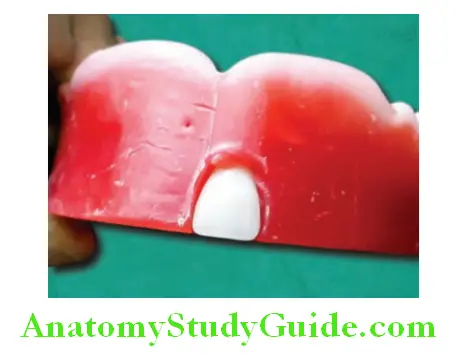
Step 1:
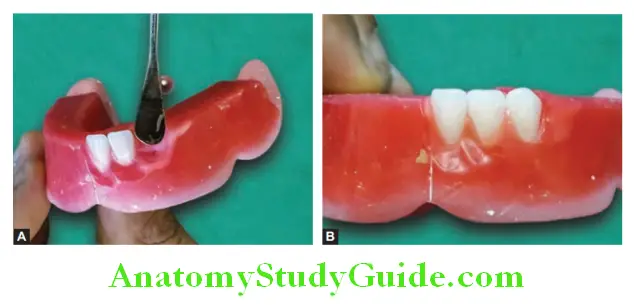
Take out canine from tooth card and clean carding wax from ridge lap area. Heat wax spatula and remove wax from labial surface of maxillary occlusion rim in area corresponding to canine space. Soften the area with hot wax spatula and arrange canine accordingly the reference chart.
Step 2:
Seal the canine in finally determined position with hot wax spatula. Put the wax rim in cold water to set the wax and tooth.

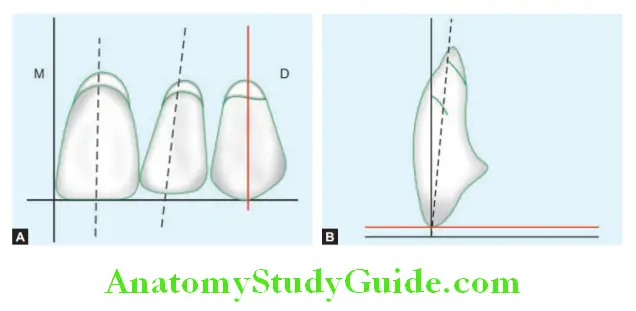
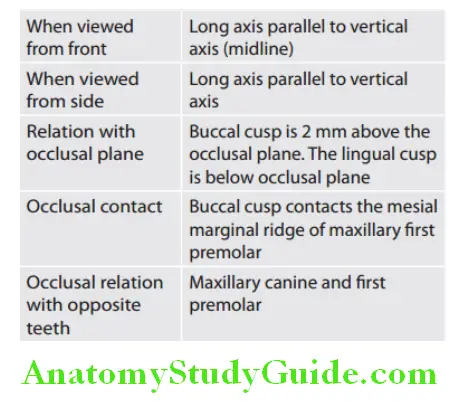
Maxillary canine arrangement guidelines:
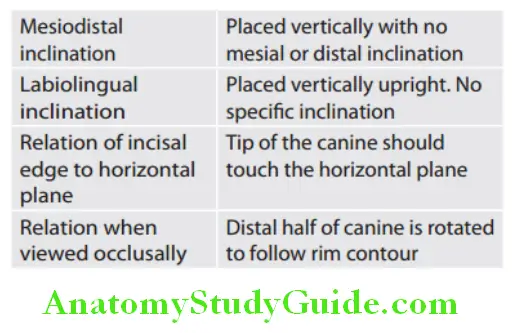
Note: When viewed from front, only mesial slope of canine is visible. The neck of canine (cervical area) is more prominent compared to centrals.
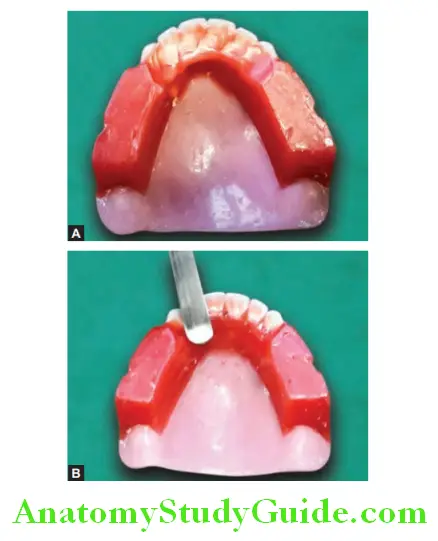
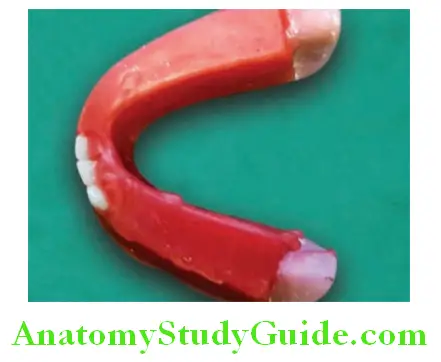
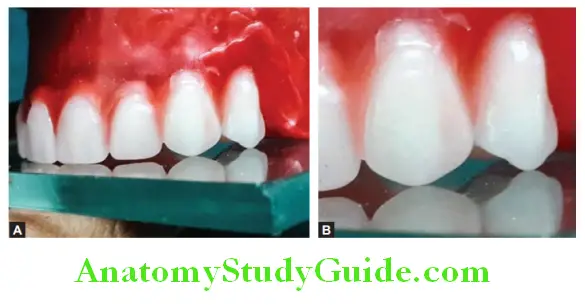
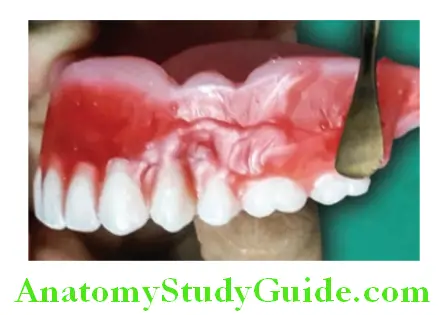
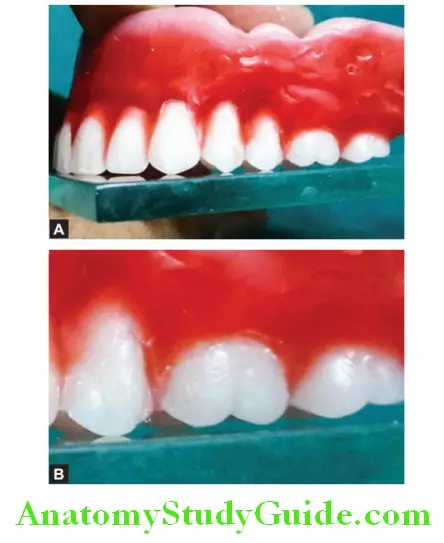
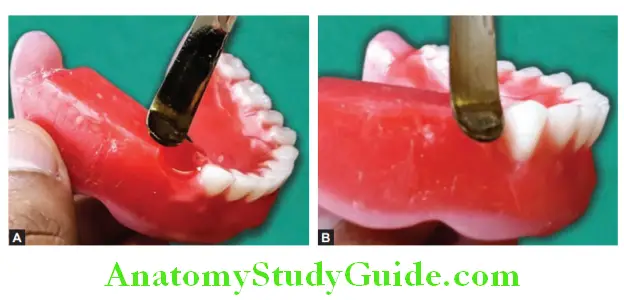
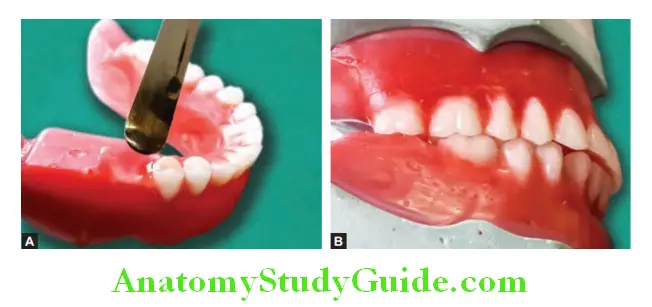
Repeat the arrangement for other side of the arch and complete arrangement of all six maxillary anterior teeth. Remove excess wax from palatal surface. Heat the curved end of wax knife and slowly remove the wax without applying any pressure, otherwise it may change the tooth position.
Teeth Arrangement In Complete Denture
Arrangement Of Mandibular Anterior Teeth
Mandibular anterior teeth are arranged slightly lingually than maxillary anterior teeth. Vertical and horizontal overlap should be attained. Remove the vertical pin from the articulator before arranging the mandibular anterior teeth.
Arrangement of Mandibular Central Incisors:
Step 1:
Remove part of wax from the area and soften remaining wax. Place the central incisor so that the long axis is parallel to vertical axis when viewed from front. The mesial surface of the central incisor should coincide with the midline marked on the wax occlusal rim and also with the maxillary teeth midline.
Step 2:
Make it sloped slightly labially (labial inclination) with neck depressed.
Step 3:
Place the incisal edge 0.5–1 mm above the occlusal plane.
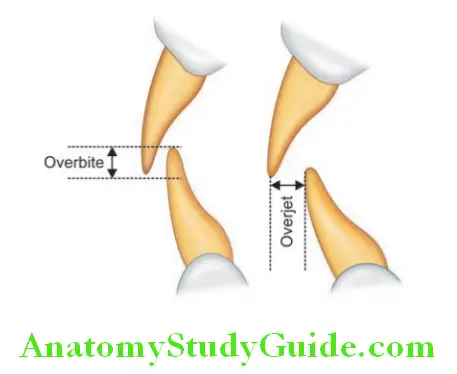
Note: The incisal edges of mandibular anteriors are placed 0.5–1 mm above the occlusal plane. This is essential to create overbite
Arrangement of Mandibular Lateral Incisors:
Step 1:
Remove part of wax from the area and soften remaining wax. Place the lateral incisor so that long axis is parallel to vertical axis. Make it sloped slight labially (labial inclination) with neck depressed. Distal end of incisor edge follows rim contour. Its incisal edge is 0.5–1 mm above the occlusal plane
Arrangement of Mandibular Canine:
Teeth Arrangement In Complete Denture
Step 1:
Remove part of wax from the area and soften remaining wax. Place the canine such that the long axis is inclined slightly toward midline (mesial inclination) when viewed from front.

Step 2:
It is also slightly inclined lingually when viewed from side. Its tip is slightly more than 1 mm above the horizontal plane. It follows labial contour of the rim.
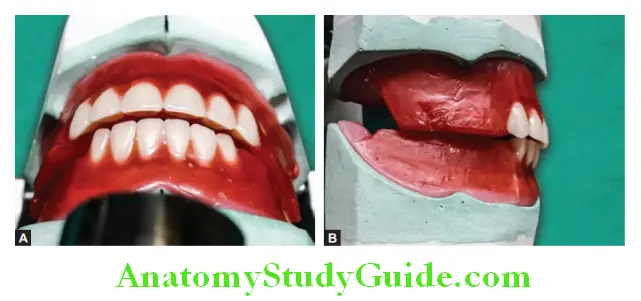
Note: Mandibular teeth when viewed occlusally should not cross land area of the cast. Arrange all six mandibular anterior teeth accordingly. Remove wax from lingual surface of teeth. Check for overjet and overbite once the maxillary and mandibular anterior teeth are arranged.
Teeth Arrangement In Complete Denture
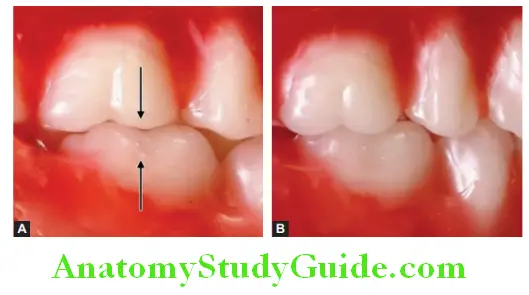
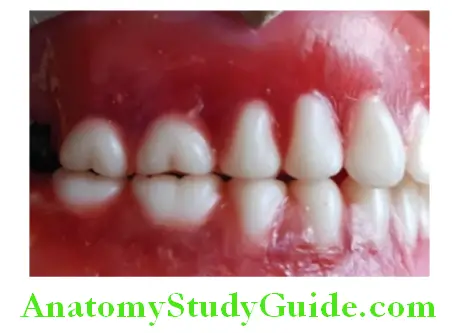
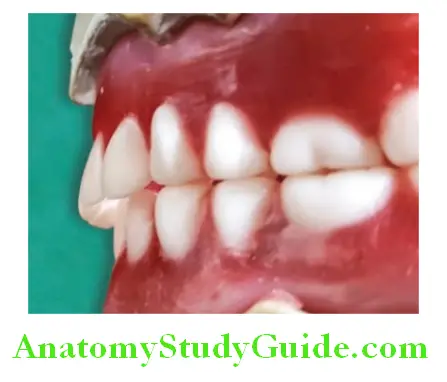
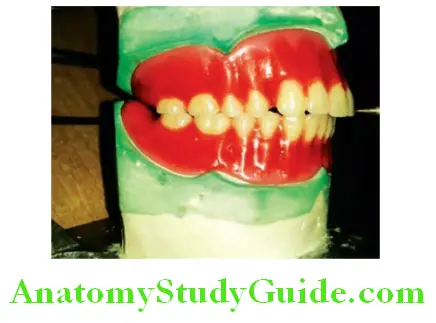
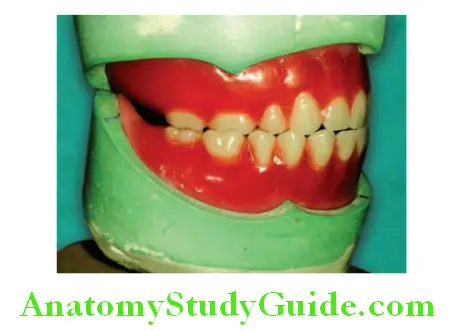
The vertical overlap between mandibular teeth and the maxillary teeth is called as over bite. It should be 0.5–1.0 mm. The horizontal overlap between the maxillary and mandibular teeth is called as overjet. It should be 1–2 mm. The overjet should be uniform from left canine to right canine.
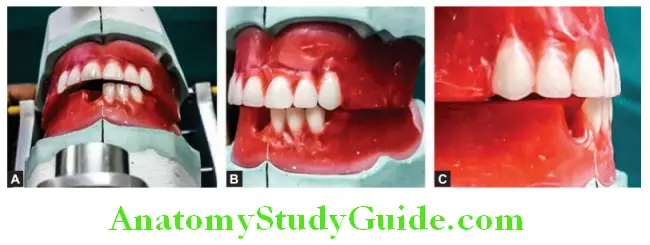
In properly arranged artificial teeth, the mesial slop of maxillary canine should overlap the distal slop of mandibular canine. This is called as “canine key of occlusion”.
Note: In some cases, the long axis of the mandibular canine may be slightly inclined distally to achieve the class-I canine relation.
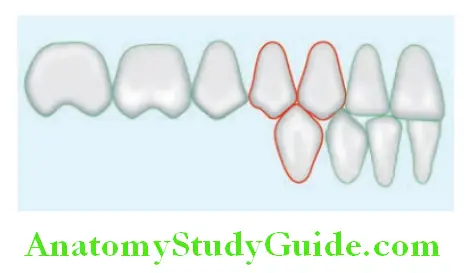
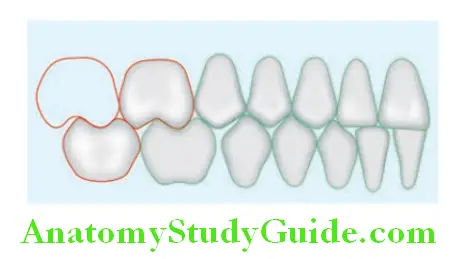
Arrangement Of Maxillary Posterior Teeth
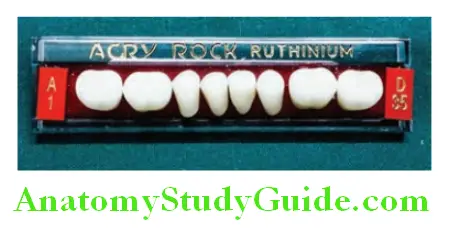
Maxillary posterior teeth are shown on tooth card.

Arrangement Of Maxillary First Premolar
Step 1:
Take out first premolar from tooth card and clean carding wax from ridge lap area. Heat wax spatula and remove wax from labial surface of maxillary occlusion rim in area where lateral incisor to be placed. Soften the area with hot wax spatula and arrange lateral incisor accordingly reference chart
Teeth Arrangement In Complete Denture
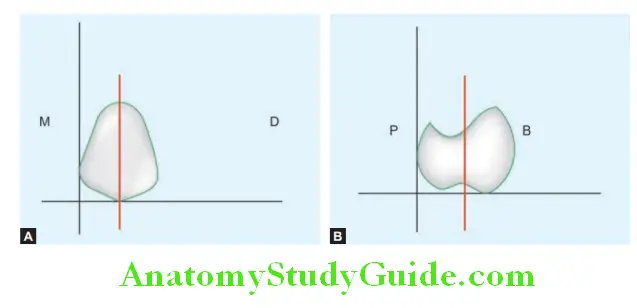
Maxillary first premolar arrangement:
Step 2:
Seal the first premolar in finally determined position with hot wax spatula. Put the wax rim in cold water to set the wax and tooth.
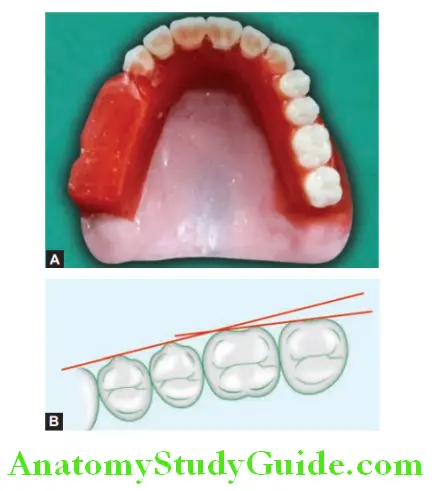
Note: When viewed occlusally, the buccal ridges of the canine and the first premolar should be flushed in one plane.
Arrangement Of Maxillary Second Premolar
Step 1:
Take out second premolar from tooth card and clean carding wax from ridge lap area. Heat wax

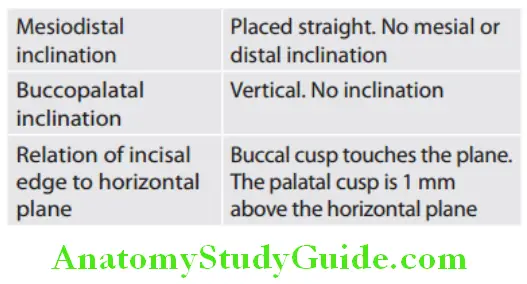
Maxillary second premolar arrangement guidelines:
spatula and remove wax from labial surface of maxillary occlusion rim in area corresponding to second premolar space. Soften the area with hot wax spatula and arrange premolar according to setup guidelines given in Table.
Step 2:
Seal the second premolar in finally determined position with hot wax spatula. Put the wax rim in cold water to set the wax and tooth.
Arrangement Of Maxillary First Molar
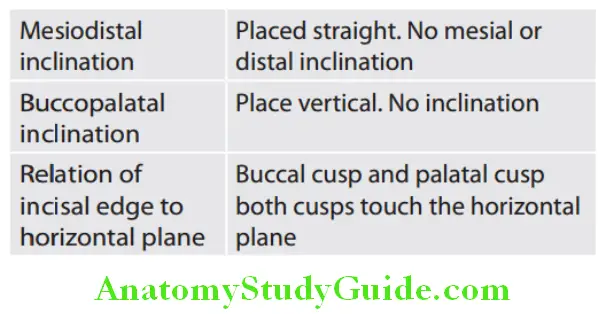
Step 1:
Remove wax from area where first molar has to be arranged. Soften whole area nicely with hot wax spatula. Arrange the first molar accordingly setup guidelines given in Table.

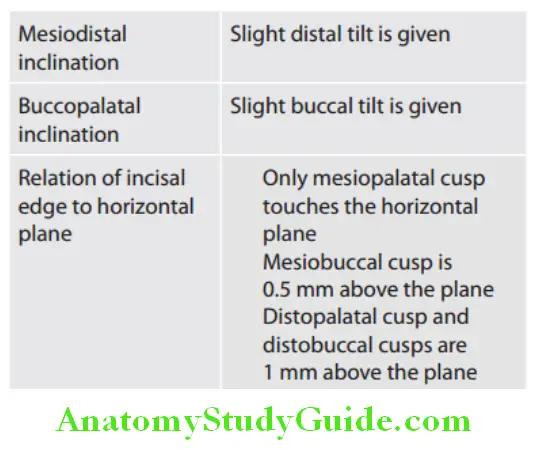
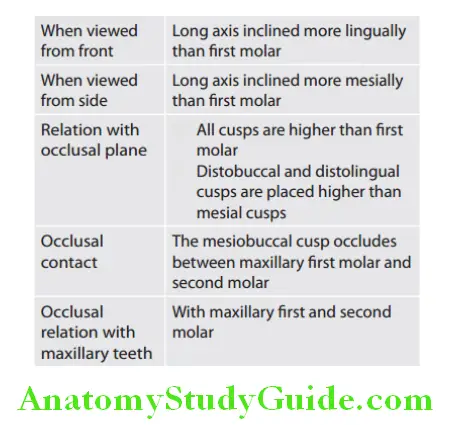
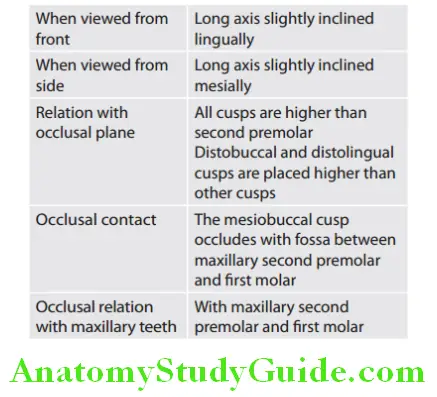
Maxillary first molar arrangement guidelines:
Step 2:
Seal the molar in finally determined position with hot wax spatula. Put the wax rim in cold water to set the wax and tooth
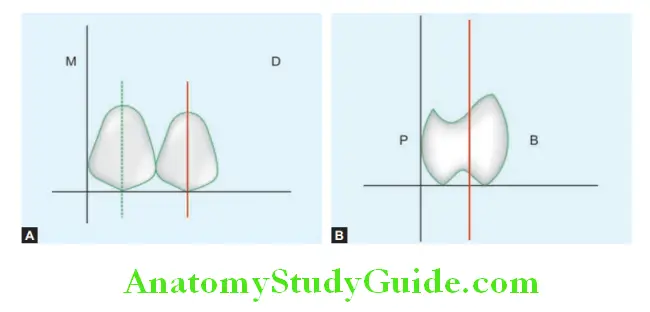
Arrangement Of Maxillary Second Molar
Step 1:
Remove wax from area where second molar has to be arranged. Soften whole area nicely with hot wax spatula. Arrange the second molar accordingly given in arrangement guidelines Table.
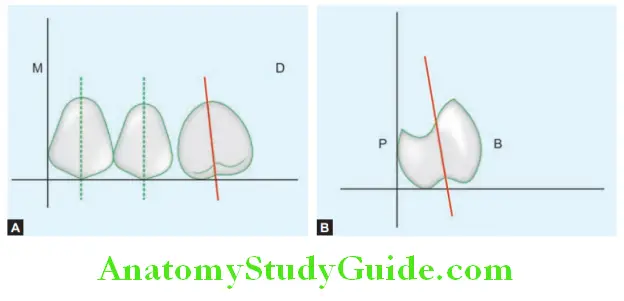
Maxillary second molar arrangement guideline:

Step 2:
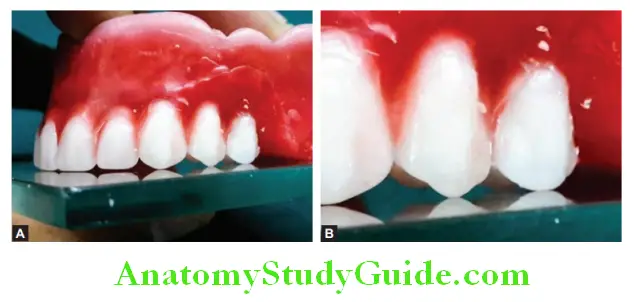
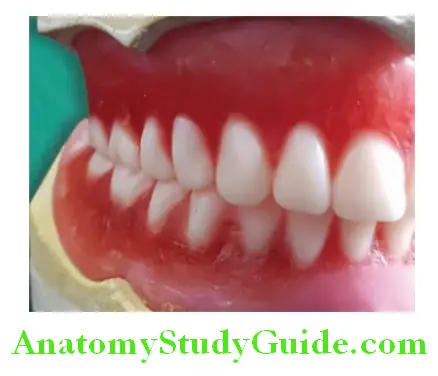
Seal the molar in finally determined position with hot wax spatula. Put the wax rim in cold water to set the wax and tooth. Four posterior teeth should be arranged in one line.
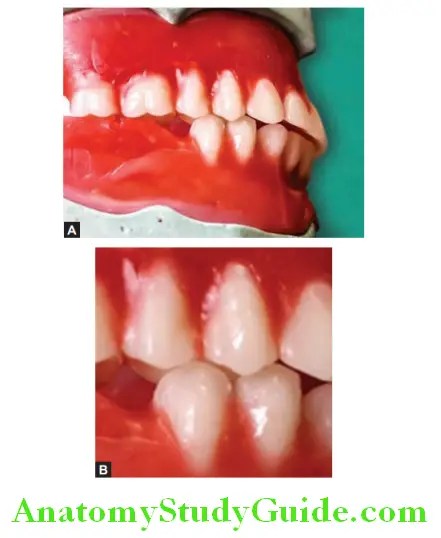
Arrangement Of Mandibular Posterior Teeth
Mandibular posterior teeth should be on the crest of the ridge and in no case lingual cusp fall outside the lingual periphery. The second molar should not be higher than two-third of retromolar pad. The cusp and fossa of mandibular teeth should fit into corresponding cusps and fossa of maxillary teeth.
Mandibular teeth should be overlapped buccally by corresponding maxillary posterior teeth. Each mandibular tooth is half a cusp mesially than opposite maxillary tooth.
Pound Triangle or Pound Lines:
An imaginary line from the mesial angle of canine to the lingual border of retromolar pad.
Note: Lingual cusps of mandibular teeth should not be arranged beyond the pound line. Otherwise they may restrict the tongue space

Arrangement Of Mandibular First Premolar
Step 1:
Mark outline on the rim and scoop out the wax from that area with hot wax spatula. The long axis of tooth is parallel to midline (placed vertically). The long axis of tooth should be inclined lingually. The buccal surface of First premolar is scarcely visible when viewed from front. Arrange according to setup guidelines.
Step 2:
Seal the tooth in finally determined position with hot wax spatula. Put the wax rim in cold water to set the wax and tooth. The lingual cusp is smaller in size so there is no lingual intercuspation when viewed lingually.
Arrangement Of Mandibular Second Premolar
Step 1:
Scoop out the wax from the second premolar area with hot wax spatula. The long axis of tooth is parallel to midline (placed vertically). The long axis of tooth should be slightly
Mandibular first premolar arrangement guidelines:
inclined lingually. Arrange according arrangement guidelines.
Step 2:
Seal the tooth in finally determined position with hot wax spatula. Put the wax rim in cold water to set the wax and tooth. The mandibular second premolar is in contact with maxillary first and second premolars.
Arrangement Of Mandibular First Molar
Step 1:
Scoop out the wax from the first molar area with hot wax spatula. Place the molar such that the mesiobuccal cusp of maxillary first molar occludes with (coincide with) mesiobuccal groove of mandibular first molar. It is slightly lingually inclined.

Mandibular second molar arrangement guidelines:
Step 2:
Seal the tooth in finally determined position with hot wax spatula. Put the wax rim in cold water to set the wax and tooth.
Mandibular first molar arrangement guidelines:
Note:
Molar key of occlusion: The mesiobuccal cusp of maxillary first molar occludes with mesiobuccal groove of mandibular first molar OR the mesiopalatal cusp of maxillary first molar occludes with central fossa of mandibular molar.
Arrangement Of Mandibular Second Molar
Step 1:
Scoop out the wax from the second molar area with hot wax spatula. Place the molar such that the mesiobuccal cusp of maxillary second molar occludes with (coincide with) mesiobuccal groove of mandibular second molar. It is slightly lingually inclined.
Step 2:
Seal the tooth in finally determined position with hot wax spatula. Put the wax rim in cold water to set the wax and tooth.
Mandibular second molar arrangement guidelines:

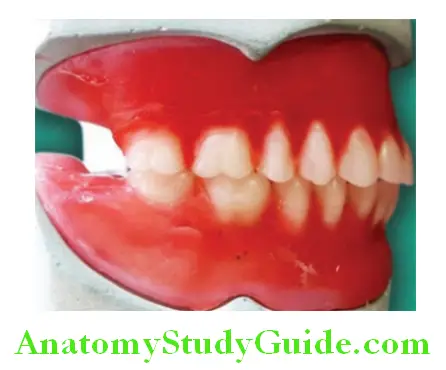
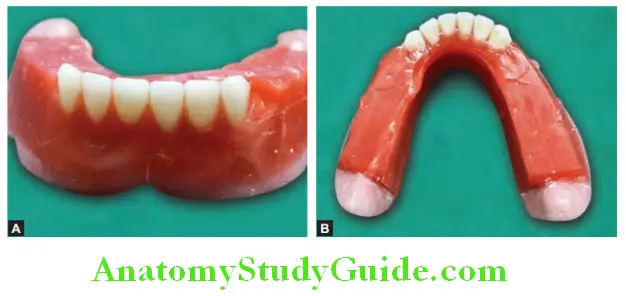
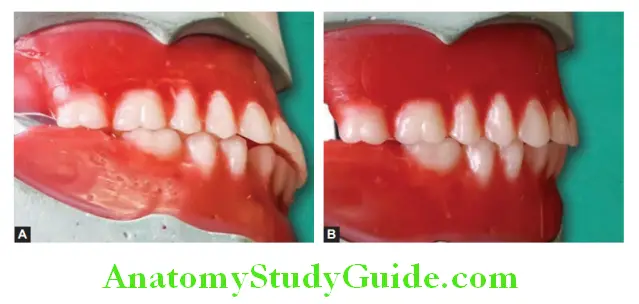
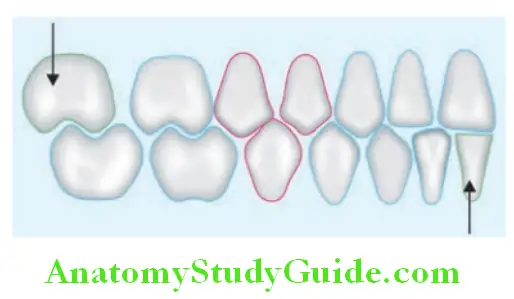
Complete arrangement of maxillary and mandibular teeth—buccal view and lingual view.
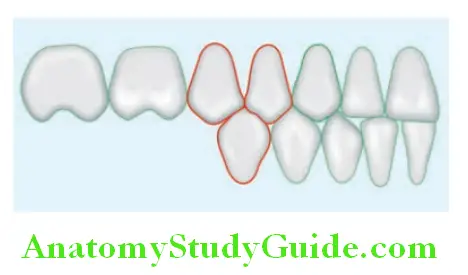
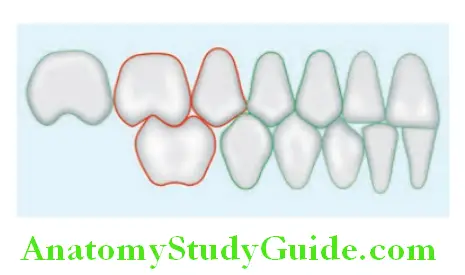
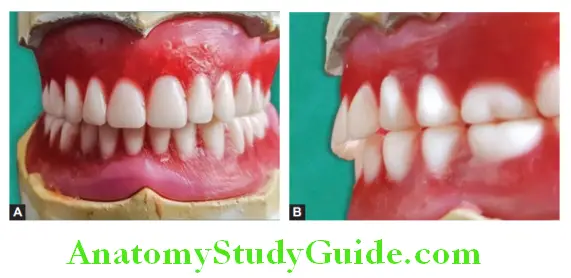
Teeth Contact:
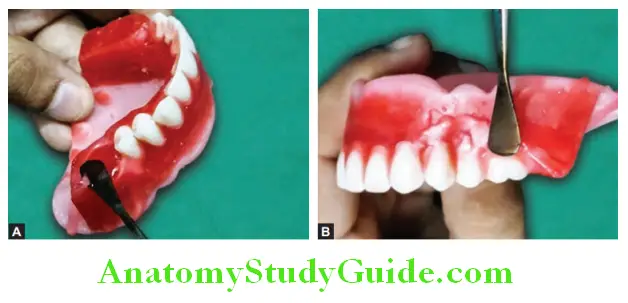
Every tooth either in maxillary arch or mandibular arch has contact with two teeth in opposite arch except mandibular central incisors and maxillary second molar. Teeth in red color shows one tooth contact with two opposite teeth, maxillary second molar and mandibular central incisor (green color) show contact with opposite single tooth.
Teeth Arrangement Using Nonanatomical (Zero Degree) Posterior Teeth
Introduction:
Nonanatomical or degree teeth are arranged for some special conditions and cases where anatomical teeth are not indicated. These are cusp less teeth with flatter occlusal table which helps in reduction of lateral forces while chewing. Eliminating the lateral forces helps in improvement in denture stability.
Indications:
- Severely resorbed residual alveolar ridge cases where horizontal/lateral forces needs to be reduced.
- In case of jaw size discrepancies, i.e. in class II and class III jaw relation cases.
- In cases, where jaw movements are uncoordinated.
Features:
Cuspless (nonanatomical/zero degree) posterior teeth are arranged on fat plane. No compensating curves are incorporated. Teeth are arranged on a straight plane.
No cusp to fossa relation between opposite arch teeth, only surface to surface contact between opposite teeth. No overbite is given. No anterior contact present in centric position. If overbite is given, it will cause tilting of denture when anterior teeth are in contact. Overjet of 2 mm or more is used to create an illusion of overbite.
Brief Notes On Class Ii And Class II Teeth Arrangement
Due to discrepancy in jaw size, the arrangement of artificial teeth should be modified accordingly.
Class II Arrangement:
In the class II relation, the mandibular ridge is smaller than maxillary ridge. The mandibular ridge is located more lingually in relation to maxillary ridge.
Teeth arrangement for class II relation has different characteristics than class I teeth arrangement as listed below:
- Horizontal overlap (overjet) increase.
- Canines are arranged more posteriorly and lingually.
- As the mandibular ridge is smaller in size, there is reduced space to arrange all the teeth. The premolars may be trimmed or one premolar bilaterally may be removed to gain space to arrange teeth on smaller size ridge.
- Semianatomic or nonanatomic teeth are selected to reduce stresses on smaller and weaker ridge.
- Molars can be arranged in class II relation (the distobuccal cusp of the maxillary first molar occludes/falls in the buccal groove of the mandibular first molar) or in class I relation.
- Give space between maxillary canine and first premolar or remove one premolar from mandibular arch to overcome space discrepancy.
Class III Arrangement:
In class III relationship, mandibular arch is larger than the maxillary arch. The discrepancy between ridge sizes certainly gives some problems during teeth arrangement. The anterior teeth of opposite arch are arranged in edge to edge relationship. There is no overbite and overjet. The incisal edges of maxillary anterior teeth are in contact with incisal edges of mandibular anterior teeth.
Maxillary anterior teeth are arranged as far forward as required to get proper lip support. Mandibular anterior teeth are arranged as far lingual as possible without interference to the tongue. In class III relationship, the posterior are arranged in crossbite relationship. Crossbite relation can be achieved by horizontally
overlapping the buccal cusps by lower teeth. OR Changing the position of posterior teeth in crossover manner will help in achieving the crossbite. In this method, the posterior teeth of first quadrant are arranged in third quadrant and posteriors of third quadrant are arranged in first quadrant. Posterior teeth of second and fourth quadrant are exchanged with each other.
Note: Anterior edge-to-edge relation and posterior crossbite, one premolar removed from maxillary arch.
Leave a Reply