Obturation Techniques
The material of choice for obturation is gutta-percha in conjunction with sealer. Obturation methods vary by direction of compaction (lateral/vertical) and/or temperature of gutta-percha used either cold or warm (plasticized).
Table of Contents
There are two basic procedures:
- Lateral compaction of cold gutta-percha
- Vertical compaction of warm gutta-percha
Other methods are the variations of the warmed guttapercha technique.
Read And Learn More: Endodontics Notes
Armamentarium For Obturation
- Primary and accessory gutta-percha points
- Spreaders and pluggers for compaction of guttapercha
- Absorbent paper points for drying the prepared root canal before applying sealer
- Lentulo spirals for placing sealer
- Scissors or GP cutter for cutting gutta-percha
- Endo gauge for measuring the size of gutta-percha
- Endo block for measuring gutta-percha points
- Endo organizer for arranging gutta-percha and accessory points of various sizes
- A heating devices like spirit lamps or butane gas torch
- Heating instruments like ball burnisher, spoon excavator, etc.
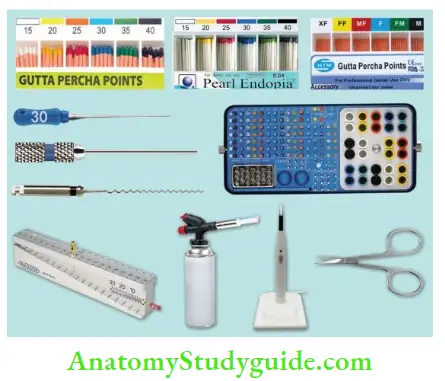
- (A) Primary gutta-percha points;
- (B) Absorbent paper points;
- (C) Accessory guttapercha points;
- (D) Spreader, plugger, and Lentulo spiral;
- (E) Endo organizer for keeping files and gutta-percha;
- (F) Endo gauge for measuring the size of gutta-percha;
- (G) Butane gas torch;
- (H) Gutta-percha cutter;
- (I) Scissor.
Root canal obturation with gutta-percha as a filling material can be mainly divided into the following groups:
- Use of cold gutta-percha
- Lateral compaction technique
- Use of chemically softened gutta-percha
- Chloroform
- Halothane
- Eucalyptol
- Use of heat-softened gutta-percha
- Vertical compaction technique
- System B continuous wave condensation technique
- Lateral/vertical compaction
- Sectional compaction technique
- McSpadden compaction of gutta-percha
- Thermoplasticized gutta-percha technique including
- Obtura II
- Ultrasonic plasticizing
- Ultrafi system
- Solid core obturation technique including
- Thermafi system
- Silver point obturation
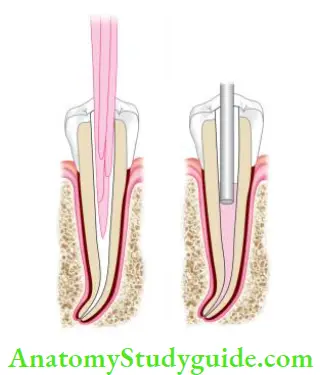
Lateral Compaction Technique
It is one of the most common methods used for root canal obturation. It involves the placement of tapered gutta-percha cones in the canal and then compacting them under pressure against the canal walls using a spreader. A canal should have a continuous tapered shape with a definite apical stop before it is ready to be filed by this method.
Technique:
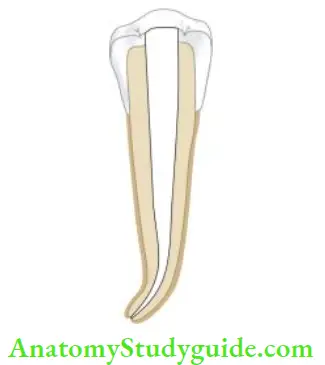
- Following the canal preparation, select the master gutta-percha cone whose diameter is the same as that of the master apical file. One should feel the tug back with master gutta-percha point. Master gutta-percha point is notched at the working distance analogous to the level of incisal or occlusal edge reference point
- Check the fi of the cone radiographically. If found satisfactory, remove the cone from the canal and place it in sodium hypochlorite:
- If the cone is short of the working length, check for dentin chip debris, any ledge, or curve in the canal and treat them accordingly
- If the cone selected is going beyond the foramen, either select the larger number cone or cut that cone to the working length
- If the cone shows an “s” shaped appearance in the radiograph, it means the cone is too small for the canal. In that case, a larger cone should be selected to fi in the canal
- Select the size of spreader to be used for lateral compaction of that tooth. It should reach 1–2 mm of true working length without binding in the canal should occur, there is a chance for tooth fracture with excessive pressures
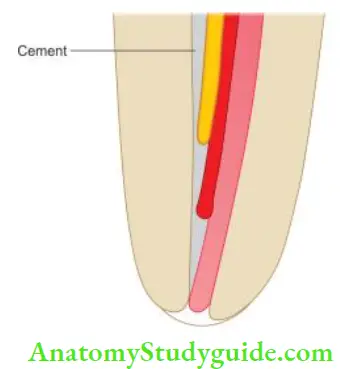
- Dry the canal with paper points and apply sealer in the canal. Place the master gutta-percha cone in the canal
- Coat the premeasured cone with sealer and place it into the canal. After master cone placement, place the spreader into the canal alongside the cone. Spreader helps in the compaction of gutta-percha. It acts as a wedge to squeeze the gutta-percha laterally under vertical pressure not by pushing it sideways. It should reach 1–2 mm of the prepared root length
- Remove the spreader by rotating it back and forth. This compacts the gutta-percha and creates a space for accessory cones lateral to the master cone
- Place the accessory cone in this space and repeat the above procedure until the spreader no longer penetrates beyond the cervical line
- Now sever the protruding gutta-percha points at the canal orifice with a hot instrument

- (A) Check the fi of the spreader;
- (B) place the master gutta-percha cone in sealer coated canal;
- (C) place the spreader
alongside the master cone to compact the cone; - (D and E) Add accessory cones in the prepared space and repeat step C to create space for more accessory cones;
- (F) Place the accessory cone in this space and repeat the above procedure until the spreader no longer penetrates beyond the cervical line.
Lateral Compaction Technique Advantages:
- Can be used in most clinical situations
- Positive dimensional stability of root filling
- During compaction of gutta-percha, it provides length control, thus decreasing the chances of overfilling
Lateral Compaction Technique Disadvantages:
- Presence of voids
- Increased sealer: GP ratio
- Does not produce homogenous mass
- Space may exist between accessory and master cones
- Time-consuming
- Less able to seal lateral canals and intracanal defects
Variation in Lateral Compaction Technique:
Use of Vibration, Heat, and Ultrasonics
An alternative to cold lateral compaction is ultrasonics, a combination of vibration and heat. Lateral compaction done with alternating heat after placing the accessory gutta-percha cone can result in better compaction.
Gutta-percha is soluble in several solvents, namely, chloroform, eucalyptol, and xylol. This property of gutta-percha is used to adapt it in various canal shapes which are amenable to be filed by lateral compaction of the gutta-percha technique.
Indications:
- In teeth with blunderbuss canals and open apices.
- The root ends with resorptive defects
- In teeth with internal resorption

Technique:
- A root canal is cleaned and shaped properly
- The cone is held with a locking tweezer which has been adjusted to the working length
- Apical 2–3 mm of the cone is dipped into a solvent for 3–5 s
- The softened cone is inserted in the canal with slight apical pressure until the beaks of the locking tweezer touch the reference point
- Here care is taken to keep the canal moistened by irrigation, otherwise, some of the softened gutta-percha may stick to the desired canal walls, though this detached segment can be easily removed by using H-file
- Radiograph is taken to verify the fit and correct working length of the cone. When found satisfactory, the cone is removed from the canal, and the canal is irrigated with sterile water or 99% isopropyl alcohol to remove the residual solvent
- After this canal is coated with sealer. The cone is dipped again for 2–3 s in the solvent and thereafter inserted into the canal with continuous apical pressure until the plier touches the reference point
- A finger spreader is then placed in the canal to compact the gutta-percha laterally
- Accessory gutta-percha cones are then placed in the space created by the spreader
- Protruding gutta-percha points are cut at the canal orifice with hot instrument
Though this method is considered good for adapting gutta-percha to the canal walls, chloroform dip fillings have been shown to produce volume shrinkage which may lead to poor apical seals.

Warm Vertical Compaction Technique
Vertical compaction of warm gutta-percha method of filing the root canal was introduced by Schilder with the objective of filing all the portals of exit with the maximum amount of gutta-percha and minimum amount of sealer. This is also known as Schilder’s technique of obturation.
In this technique using heated pluggers, pressure is applied in the vertical direction to heat the softened gutta-percha which causes it to flow and fill the canal space.
The basic requirements of a prepared canal to be filed by vertical compaction technique are
- Continuous tapering funnel shape from orifice to the apex
- Apical opening to be as small as possible so as to prevent extrusion of obturating material
- Decreasing the cross-sectional diameter at every point apically and increasing at each point as the canal is approached coronally
Technique:
- Select a master cone according to the shape and size of the prepared canal. The cone should fit in 1–2 mm of the apical stop because when softened material moves apically into the prepared canal, it adapts better to the canal walls
- Confirm the fi of the cone radiographically, if found satisfactory, remove it from the canal and place in sodium hypochlorite
- Irrigate the canal and then dry by rinsing it with alcohol and later using the paper points
- Select the heat-transferring instrument and pluggers according to canal shape and size
- Pluggers are profited at 5 mm intervals so as to capture the maximum cross-section area of the softened gutta-percha
- Lightly coat the canal with sealer
- Cut the coronal end of the selected gutta-percha at the incisal or occlusal reference point
- Now use a heated plugger to force the gutta-percha into the canal. The blunt end of the plugger creates a deep depression in the center of the master cone.
- The outer walls of softened gutta-percha are then folded inward to fil the central void; at the same time, the mass of softened gutta-percha is moved apically and laterally. This procedure also removes 2–3 mm of the coronal part of the gutta-percha
- Once the apical filing is done, complete the obturation by doing backfilling. Obturate the remaining canal by heating small segments of gutta-percha, carrying them into the canal, and then compacting them using heated pluggers as described above
- Take care not to overheat the gutta-percha because it will become too soft to handle
- Do not apply sealer on the softened segments of guttapercha because the sealer will prevent their adherence to the body of gutta-percha present in the canal
- After completion of obturation, clean the pulp chamber with alcohol to remove remnants of sealer or gutta-percha

Warm Vertical Compaction Technique Advantages:
- Excellent sealing of canal apically, laterally, and obturation of lateral as well as accessory canals
- Oval canals get better filed than with lateral compaction technique
Warm Vertical Compaction Technique Disadvantages:
- Increased risk of vertical root fracture
- Overfilling of canals with gutta-percha or sealer from the apex
- Time-consuming
- Difficult to use in curved canals where rigid pluggers are unable to penetrate to the required depth
Temperature Control
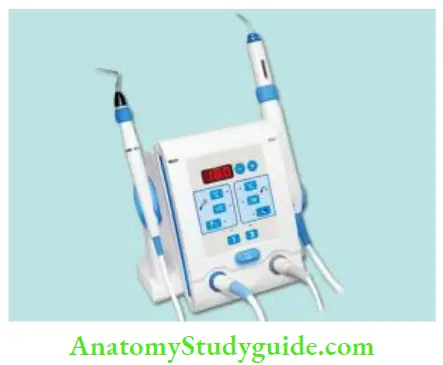
System B, Downpak cordless obturation device, and Touch and Heat are the devices which permit temperature control.
System B: Continuous Wave Condensation Technique:
System B is a newly developed device by Buchanan for warming gutta-percha in the canal. It monitors the temperature at the tip of heat carrier pluggers, thereby delivering a precise amount of heat
To have satisfactory 3-D obturation by using the System B technique, the following precautions should be taken:
- The canal shape should be continuous and perfectly tapered
- Do not set System B at a high temperature because this may burn gutta-perch
- While down packing, apply a constant firm pressure
Technique
- Select the Buchanan plugger which matches with the selected gutta-percha cone. Place rubber stop on the plugger and adjust it to its binding point in the canal 5–7 mm short of working length
- Confirm the fi of the gutta-percha cone
- Dry the canal, cut the gutta-percha 0.5 mm short of working length, and apply sealer in the canal
- With the System, B turned on to “use,” place it in touch mode, set the temperature at 200°C, and dial the power setting to 10. Sever the cone at the orifice with a preheated plugger.
- Afterward, a plugger is used to compact the softened gutta-percha at the orifice. Push the plugger smoothly through gutta-percha to 3–4 mm of binding point
- Release the switch. Hold the plugger here for 10 s with sustained pressure to take up any shrinkage which might occur upon cooling of gutta-percha
- Maintaining the apical pressure, activate the heat switch for 1 sec followed by 1 sec pause, and then remove the plugger
- After removal of the plugger, introduce a small flexible end of another plugger with pressure to confirm that the apical mass of gutta-percha has cooled, set, and not dislodged. Following radiographic confirmation, the canal is ready for the backfill by any means

System B: Continuous Wave Condensation Technique Advantages:
- It creates a single wave of heating and compacting thereby. Compaction of filling material can be done at the same time when it has been heating softened
- Excellent apical control
- Less technique sensitive
- Fast, easy, predictable
- Through condensation of the main canal and lateral canals
- Compaction of obturating materials occurs at all levels simultaneously throughout the momentum of heating and compacting instrument apically
Lateral/Vertical Compaction of Warm Gutta-Percha:
Vertical compaction causes dense obturation of the root canal, while lateral compaction provides length control and satisfactory ease and speed.
The advantages of both of these techniques are provided by a newer device, Endotec II, which helps the operator to employ length control with the warm gutta-percha technique. It comes with a battery which provides energy to heat the attached plugger and spreader.
Technique:
- Adapt master gutta-percha cone in the canal, select endnotes plugger, and activate the device
- Insert the heated plugger in the canal beside the master cone to be within 3–4 mm of the apex using light apical pressure
- Afterward, an unheated spreader can be placed in the canal to create more space for accessory cones. This process is continued until the canal is filed
Lateral/Vertical Compaction of Warm Gutta-Percha Advantages:
- Three-dimensional obturation of the canal
- Better sealing of accessory and lateral canals
- Endotec can also be used to soften and remove the gutta-percha
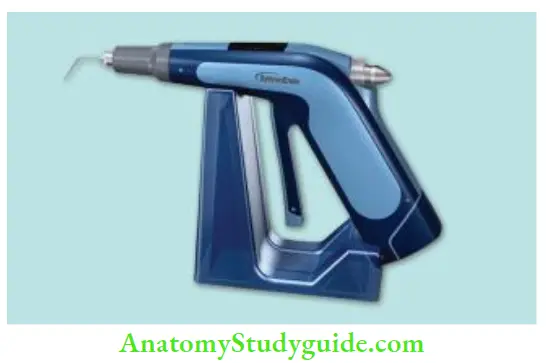
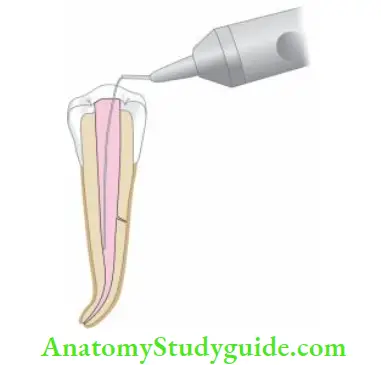
Calamus:
Calamus is a recent technique of obturation of the root canal system. It combines both Calamus “Pack” and Calamus “Flow” handpieces. With the Pack and Flow positioned side by side, a dense apical plug is created. Its handpiece has a 360° activation cuff which provides a smooth,
the continuous flow of gutta-percha.
Calamus Flow handpiece is used with a one-piece gutta-percha cartridge and integrated cannula to dispense warm gutta-percha. Calamus Pack handpiece with an electric heat plugger (EHP) is used to thermosoften, remove, and condense gutta-percha. Th EHPs are available in three ISO colors—black, yellow, and blue—which correspond to working end diameters and tapers of 40/03, 50/05, and 60/06, respectively.
Leave a Reply