Fabrication Of Custom Tray On Maxillary And Mandibular Primary Casts Introduction
The custom tray is an individualized tray used for making a final impression of an edentulous foundation. It can be made with various materials and methods. In this chapter, various materials and methods are demonstrated to make custom trays on maxillary and mandibular primary casts.
Table of Contents
Armamentarium
- Primary casts with adapted spacer.
- Tray material (or self-cure acrylic resin).
- Porcelain jar with lid.
- Mixing spatula.
- Petroleum jelly.
- Lathe and acrylic trimmer.
Read and Learn More: Preclinical Prosthodontics Notes
In the present demonstration, the maxillary custom tray is fabricated using tray material. Tray material is a self-cure acrylic resin with more amounts of filler particles added. This material has good dimensional stability (fit) due to less polymerization shrinkage but requires a bulk of material for strength. The custom tray fabricated of tray material should have a minimum thickness of 2–3 mm to provide stability and strength to the custom tray.
Step 1:
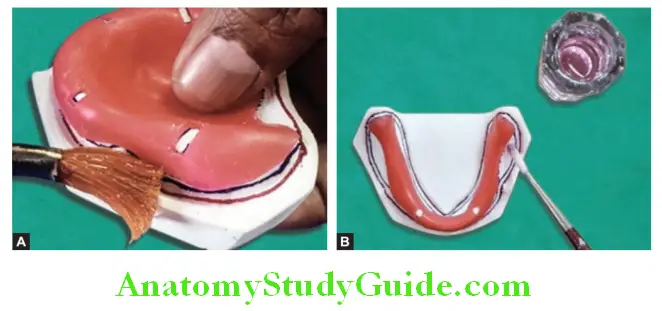
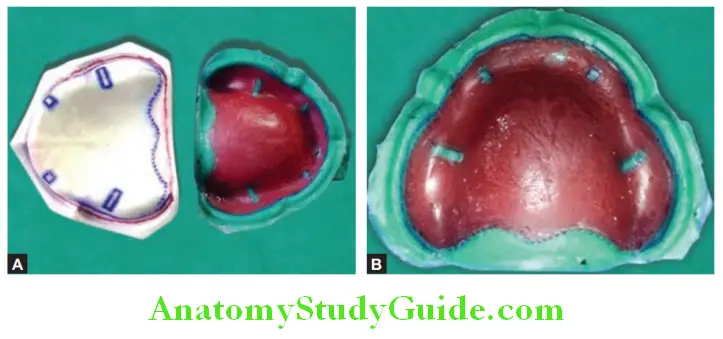
Cold mold seal is applied on the cast using a fine bristle brush. Application of cold mold seal is done in one direction only. No need to apply a cold mold seal on the wax spacer. The small brush is used to apply a separating medium on windows created for tissue stops.
Step 2:
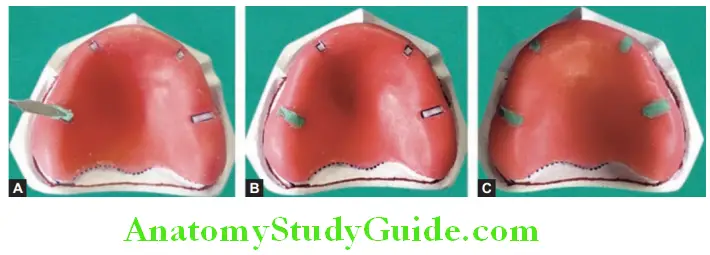
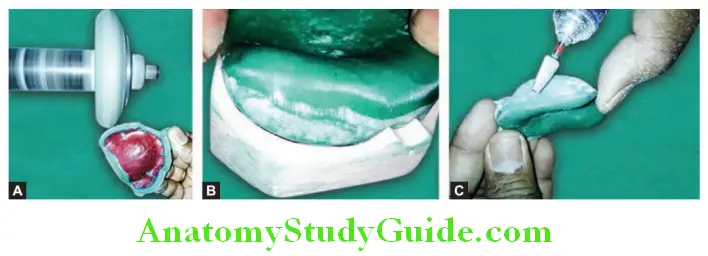
Tray material is mixed with monomer in a porcelain jar according to the recommended ratio by the manufacturer. It is allowed to attain dough stage for proper handling of material. Meanwhile, a small quantity of material is placed in windows created to make tissue stop. This confirms that tray material is in contact with cast-through windows to take up the shape of tissue stops.
Step 3:
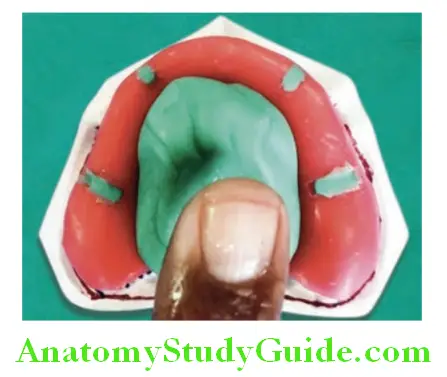
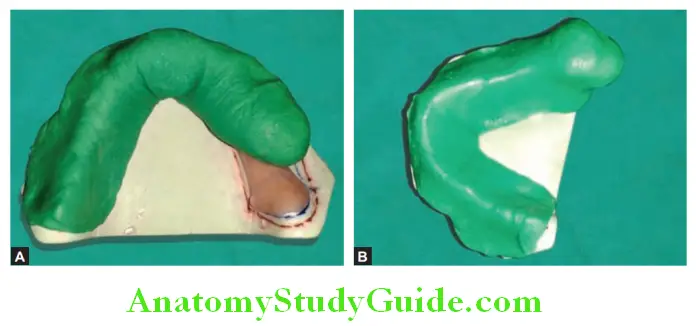
Petroleum jelly is applied to fingers to prevent material adhesion. The material in the dough stage is taken out from the porcelain jar kneaded to give the desired shape and placed on the palate. The acrylic dough is shaped as rope or roll for the fabrication of a mandibular custom tray.
Step 4:
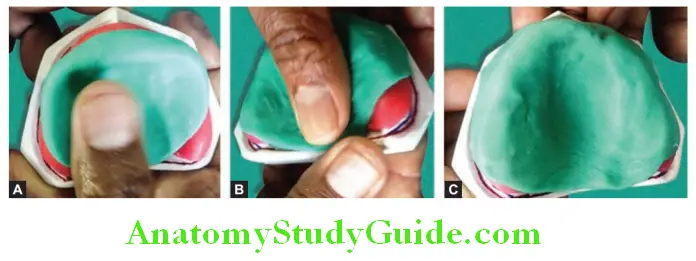
Adapt the material to the casts and carefully spread it all over the foundation area starting from the palatal area to the periphery. Apply proper finger pressure while adapting the resin over-cast. Avoid excessive pressure while adaptation otherwise it will over-thin the resin. Minimum 2–3 mm thickness of tray material should be maintained all over. Tray material should cover all of the denture foundation areas till the sulcus. Avoid excessive thickness on the palatal part.
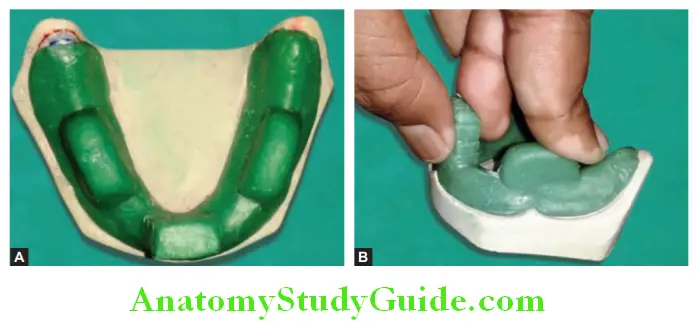
For the mandibular custom tray, take out material from the porcelain cup shape it like a roll, and put it on the residual ridge. Start spreading the material all over the edentulous ridge. Cover retromolar pad bilaterally. Do not apply pressure excessively. Excessive pressure will over-thin the custom tray.

Note: Remove excess tray material from the borders with Le Cron carver so that the borders extend only up to the tray line. However, if the material has passed the late dough stage, do not attempt to cut the excess. This will drag tray borders and make it uneven and distorted.
Step 5:
A small amount of monomer (2–3 drops) can be applied on the surface of the tray material to remove folds and wrinkles if any.
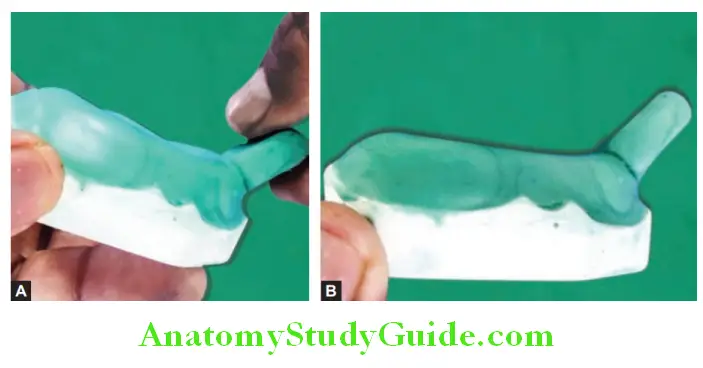
Step 6:
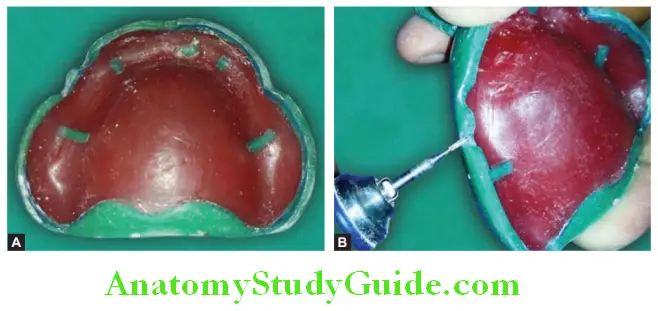
A small amount of tray material is mixed separately to make a tray handle. It is prepared separately and attached to the custom tray in the anterior part. The handle for the maxillary custom tray should be at 45° angulation to the custom tray. The handle is 8 mm in height, 8 mm in width, and 3–4 mm in thickness.
For Mandibular Custom Tray:
The tray handle for the mandibular tray is placed at 90° angulation to the tray. Usually, two more fingerrests are placed on either side of the first molar area. These fingerrests are placed to apply an equal amount of pressure while making an impression.
Step 7:
Place the custom tray along with the cast into a rubber bowl full of water and allow polymerization. Separate the custom tray slowly from the cast once the material is set.
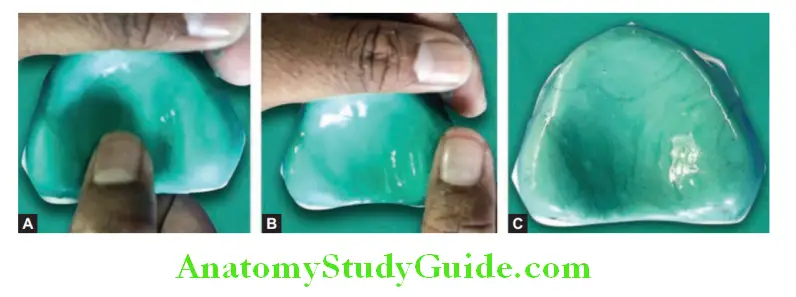
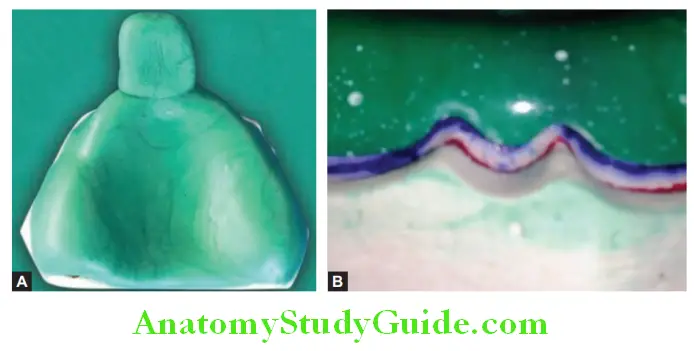
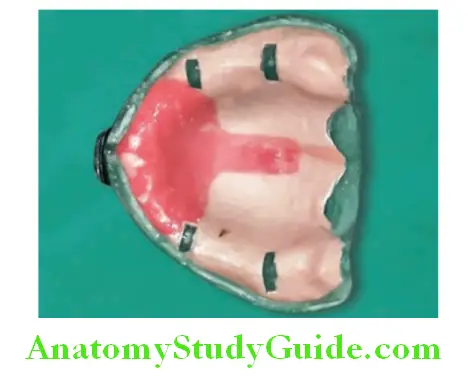
Inspect the custom tray. The tissue stops and the spacer should be at the same level. All tissue stops should be well-formed and should be in contact with the cast.
Step 8:
Trim the excess material beyond the land area on the lathe machine. Use the acrylic trimmer to shorten the tray borders 2–3 mm from the sulcus line.
Step 9:
Maintain the thickness of the tray borders up to 2–3 mm. Make wide notches for all frenum with straight fissure metal or acrylic laboratory bur. Make the tray borders rounded. There should be no sharp projections, otherwise, it may traumatize the oral tissue during the border molding procedure.
Step 10:
Some grooves are prepared on the tray handle. This will improve the grip in tray handling by the dentist. Make sure that the custom tray is 2–3 mm short of the sulcus line drawn on the primary cast. Enough space is created in the form of the notch for frenum.
Leave a Reply