Fabrication of Denture Base Record Base Introduction
Record base can be fabricated using various materials with various methods. This chapter demonstrates various method of fabrication of record base.
Table of Contents
Sprinkle-On Method
This is excellent method for fabrication of record base. This method gives record base of best fit and adaptation compared to finger adapted dough method. Operator can easily control thickness of record base. This is easy method to fabricate record base. This is easy method for fabrication of record base and an ideal method for beginners/students.
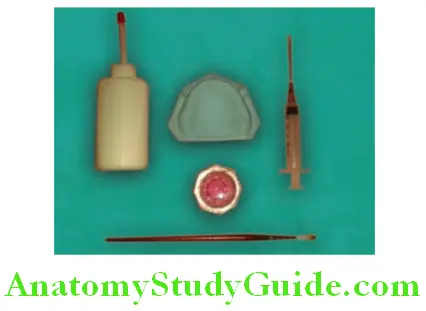
Armamentarium:
- Maxillary final cast
- Self-cure acrylic resin in dispenser
- Self-cure monomer
Read and Learn More: Preclinical Prosthodontics Notes
- Syringe
- Cold mold seal
- Painting brush
- Dappen dish.
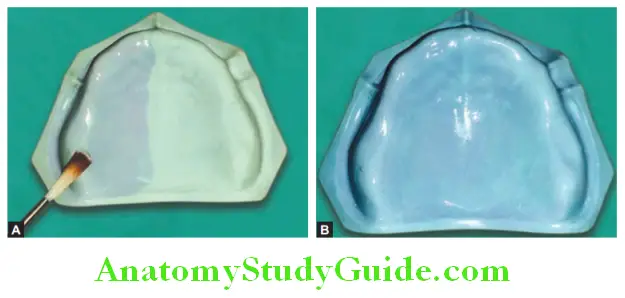
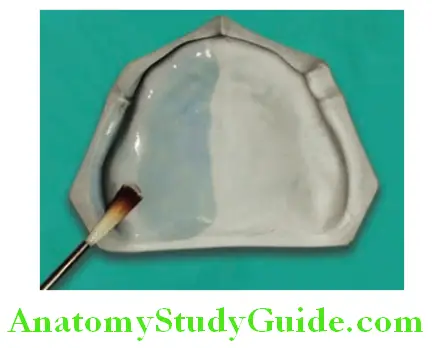
Step 1:
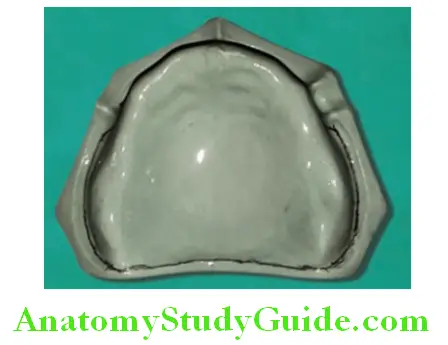
Mark denture borders with indelible pencil in the sulcus depth. Apply cold mold seal (separating medium) on maxillary cast with painting brush. Repeat application 2–3 times to achieve even coating of it.
Step 2:
Apply desired quantity of self-cure polymer on smaller area of cast and saturate it with monomer liquid. Repeat the procedure as needed. A syringe can be used for dropping the monomer on polymer.
Step 3:
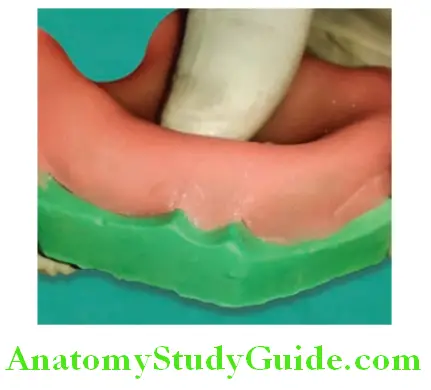
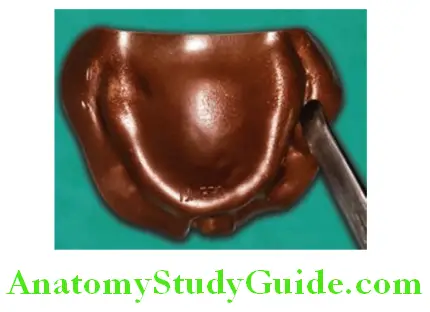
Apply material in sulcus in such a way that it fills sulcus evenly. This will record proper width and depth of sulcus. Proper recording of width and height of sulcus is essential to achieve retention of record base.

Note: Use small plastic bottle with nozzle to dispense polymer powder and syringe with needle to dispense monomer liquid drop by drop. Bend needle as shown in picture for easy use and visualization.
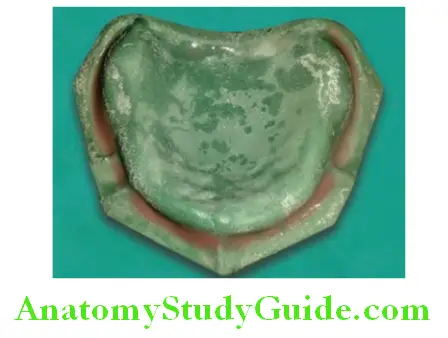
Step 4:
Repeat the procedure until even thickness of denture base of around 2–3 mm is achieved. Extend the procedure all over the cast to cover entire denture foundation area with the acrylic resin
Step 5:
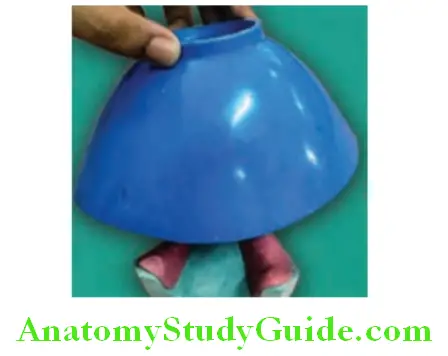
Cover it under rubber bowl for 10–20 minutes for creating monomer saturated environment under rubber bowl to reduce surface porosity. Record base fabricated with self-cure acrylic resin can be cured in pressure pot for 20 minutes at 20 psi pressure. Record bases cured under pressure have less porosity. Record base cured at normal atmospheric pressure has better fit than cured under pressure.
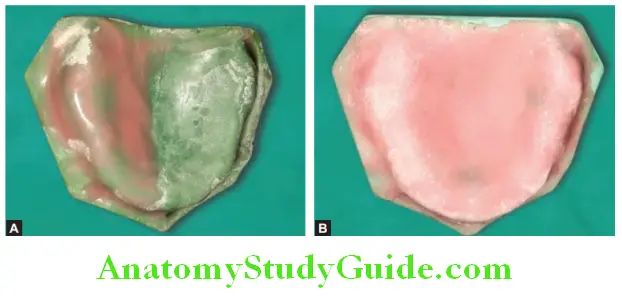
Step 6:
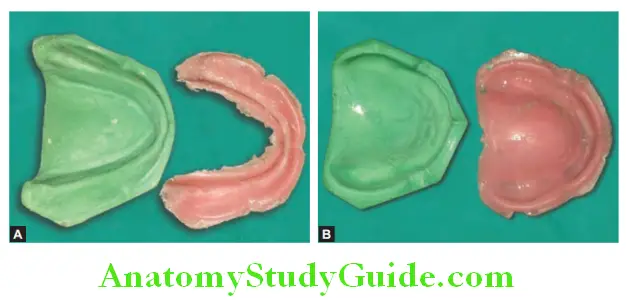
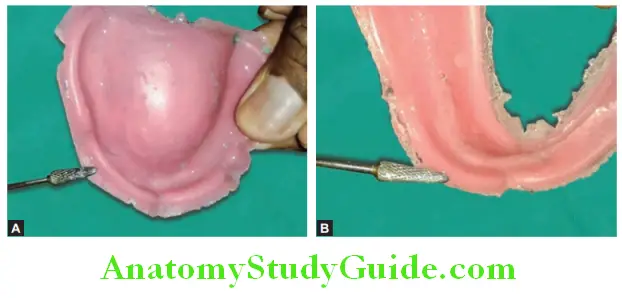
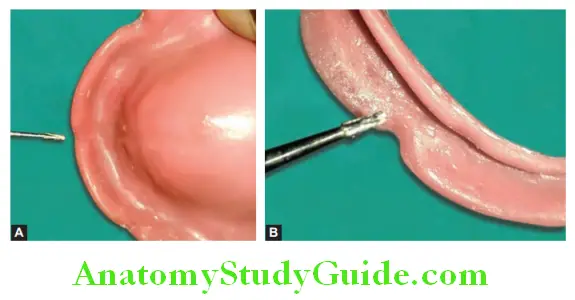
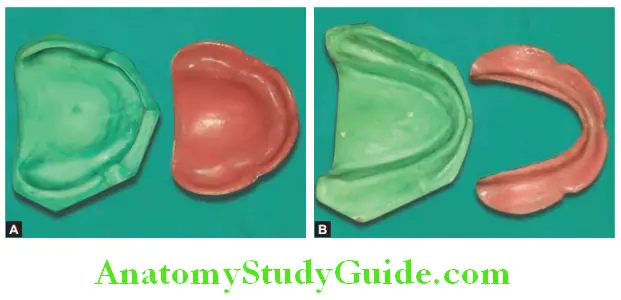
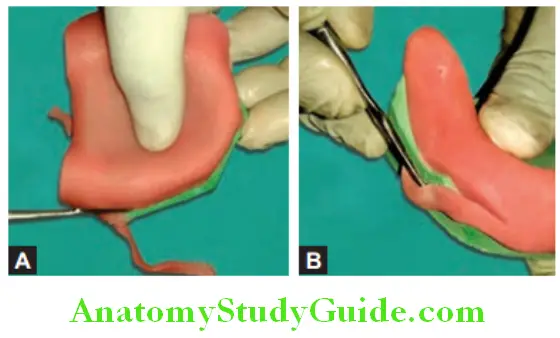
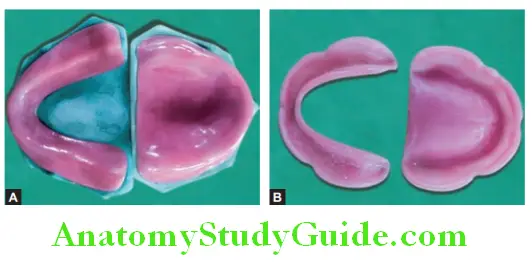
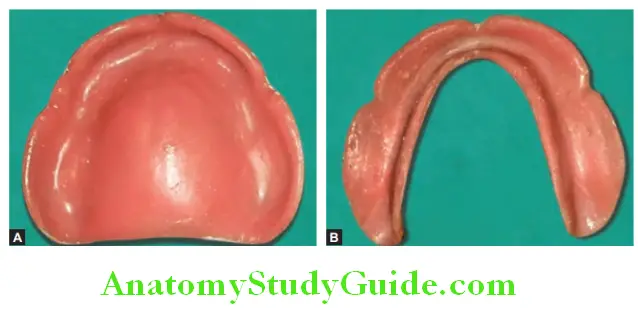
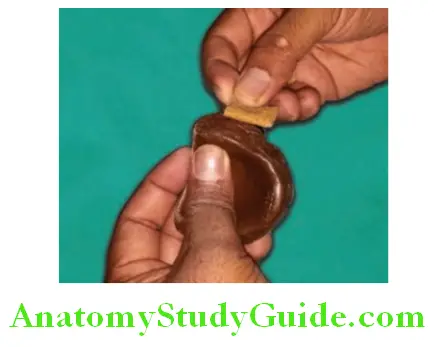
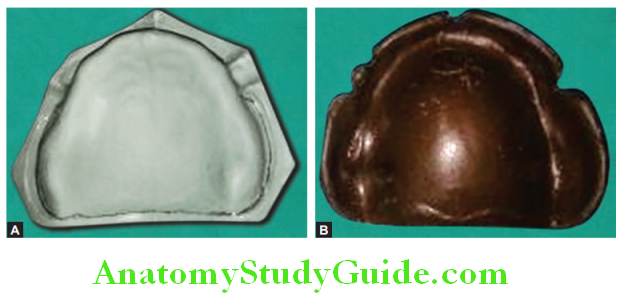
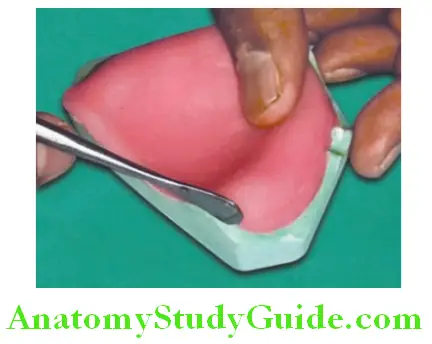
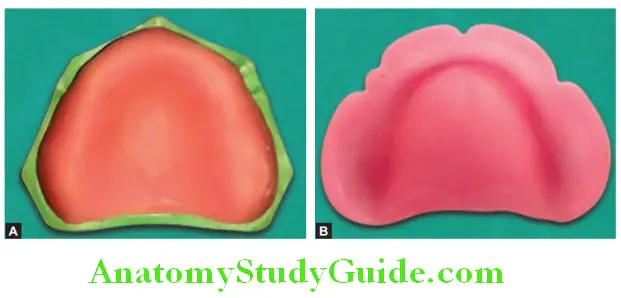
Remove it carefully with sharp instrument without damaging the cast or record base. Examine cured record base carefully. Remove any excess material from borders using acrylic trimmer. Make notches to relieve frenums. Notches are created using small straight fissure laboratory tungsten carbide bur. Finish and polish it. Store it in water while waiting for next appointment/exercise.
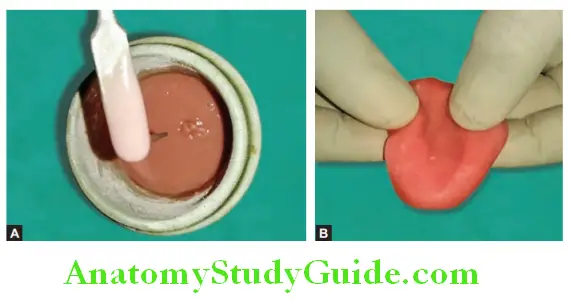
Finger Adapted Dough Method
An alternate method of making record base is finger adapted dough method. Instead of sprinkling on polymer and saturating it with monomer, mix the polymer and monomer together until the mixture attains dough consistency.
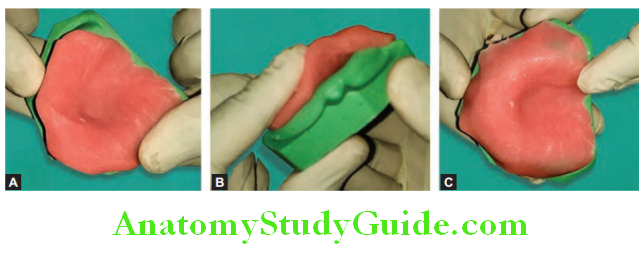
When the polymer-monomer mixture attains dough consistency, it is removed from the porcelain jar and adapted on cast in such a way that the record base of even thickness of 2–3 mm is fabricated.
Thickness of record base is kept 1–1.5 mm over crest and facial/buccal slopes of ridge. This will prevent trimming of teeth (ridge lap area) while arrangement in case of less interarch space.
Step 1:
Apply cold mold seal (separating medium) on maxillary cast with painting brush. Repeat application 2–3 times to achieve even coating of it.
Step 2:
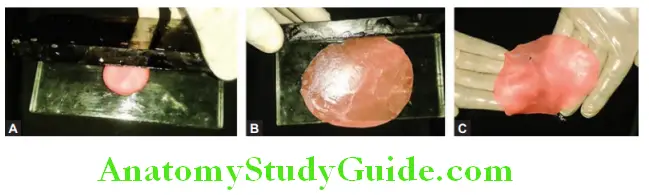
Manipulate required amount of self-cured polymer and monomer in porcelain jar and wait till it attains dough consistency. Apply
Vaseline on palm and collect material from porcelain jar, mix it well using finger.
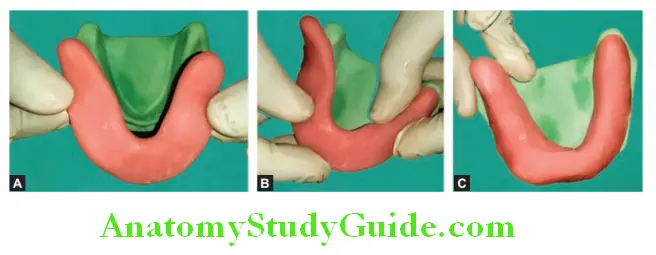
Step 3:
Place the mixed material on palatal part of maxillary cast. Start spreading it and adapting it on the cast till it covers full foundation area. Wetting fingers with monomer or water will
prevent material adhering to fingers or wear gloves to prevent adhesion. For fabrication of mandibular record base, shape the acrylic resin in rope shape and place on one end (retromolar pad) of the edentulous foundation and start covering the whole foundation area
Step 4:
Remove excess material beyond the land area. If needed, cut the excess material with paper cutter or BP blade. Ensure proper adaptation of resin in vestibule area. Take care while adapting the resin not to reduce the thickness of record base.
Step 5:
Allow record base to cure under rubber bowl or under pressure in pressure pot.
Step 6:
Make notches to relieve all the frenum. Smooth rough surface if any
Forming Resin Sheet To Fabricate Record Base
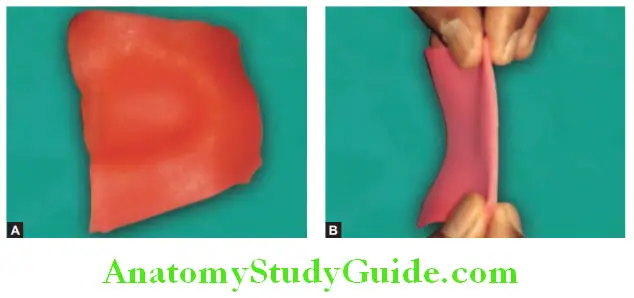
A modification to finger adapted dough method is to roll the acrylic dough in a sheet of desired thickness and adapting it on cast to fabricate record base. Acrylic dough can be rolled in sheets by pressing it between two lubricated glass slabs or by using the stone mold. Resin sheets can also be fabricated by pressing the resin dough between two lubricated glass slabs.
Fabrication Of Record Base By Shellac Baseplate
Armamentarium:
- Final cast
- Shellac baseplate
- Slurry water
- Cotton
- Chip blower
- Curved scissors
- Wax knife
- Wax spatula
- Pencil to mark borders and frenum.
Shellac is available in form of baseplates in di erent shapes for maxillary
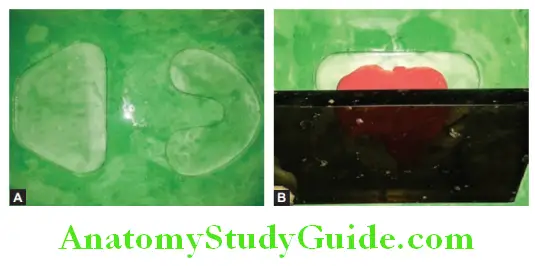

and mandibular arch. It is made up of resinous exudate of a scale insect and added fillers such as talc and mica. When heated it become soft and can be easily adapted on cast, on cooling become rigid and dimensionally stable. It is easy to manipulate and adapt shellac. If needed, correction can be done by heating it again. The main disadvantage of shellac is that it may lose its initial adaptation by temperature change during making wax rim on it or during adapting on different areas on cast.
Step 1:
Soak the cast in slurry water to make it wet. This will prevent sticking of shellac on the cast and damage of cast.
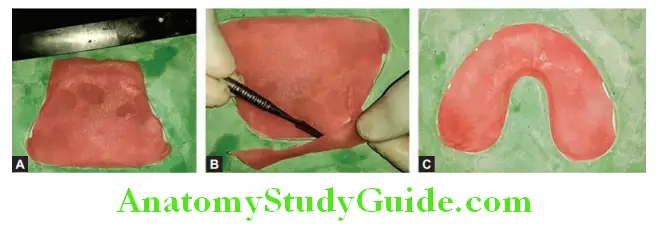
Step 2:
Pass the shellac baseplate over the flame of Bunsen burner till it become soft and moldable. Place it over the wet cast and try to adapt it on cast. Apply heat as needed and continuously adapt it with finger.
Step 3:
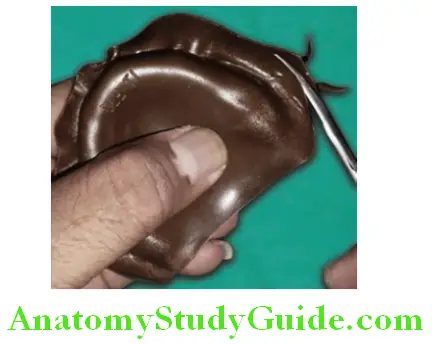
Use curved end of wax knife or wax spatula to adapt it into sulcus.
Step 4:
Cut the excess shellac baseplate beyond the land area by curved scissors. Heat the material over burner flame with chip blower for easy cutting.
Step 5:
Fold remaining shellac baseplate into sulcus in such a way that it fills the sulcus. This is done to record the width and depth of sulcus. Apply heat if needed and merge it nicely to remove rough area.

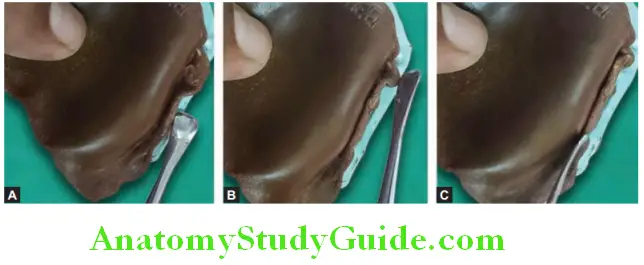
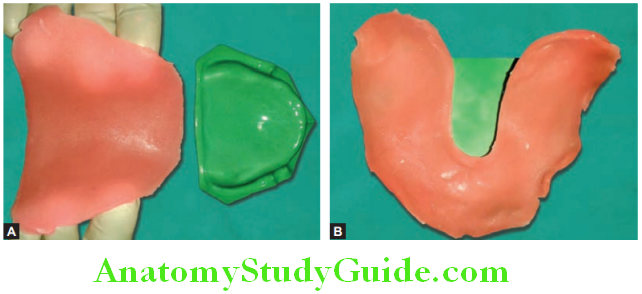
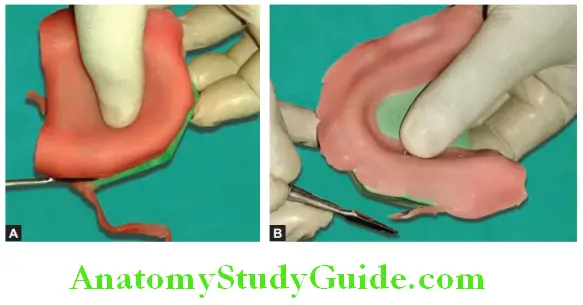
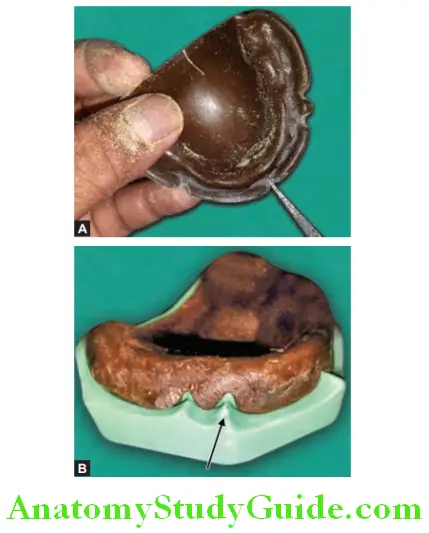
Step 6:
Allow it for cooling and remove it carefully. Examine borders, if needed remove extra material with filling.
Note: The margin of the baseplate should be filled and flushed with the vestibular depth of the cast.
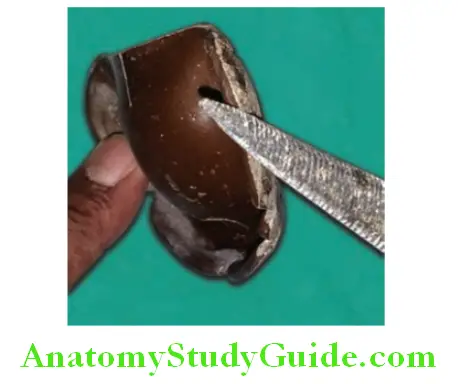
Step 7:
Provide enough clearance for all frenum.
Step 8:
Inspect the borders and smooth them with sand paper wherever needed. Shellac record base is ready for use.
Fabrication Of Record Base By Light Cure Acrylic Resin
Light cure resin is available in sheets in light protected box. It is easy to adapt, shape, and adjust the light cure resin sheet on the cast. It is very quick method for fabrication of record base but costly compared to other material and methods. It requires special equipment for polymerization of light cure resin. Sheets are available in uniform thickness
Step 1:
Take sheet of light cure acrylic resin and adapt it on the cast.
Step 2:
Cut extra material beyond the land area with BP blade.
Step 3:
Adapt material in sulcus area with wax spatula.
Step 4:
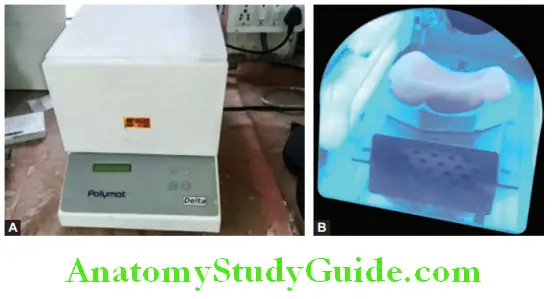
Cure it in curing chamber for 10 minutes.
Step 5:
Inspect the borders. Trim and smoothen if needed. Light cure denture base is ready for use

Leave a Reply